Get started with Page Editor
Use the Page Editor to add, arrange and review content for an individual sitemap page. This quick start explains the main areas of the workspace and helps you add your first content block.
Before you begin
Content Planner is available during the 14-day free trial and on Pro, Team and Agency plans.
Your ability to edit or comment depends on your project role and page assignments. See User roles and permissions in Slickplan for complete access details.
Explore the Page Editor
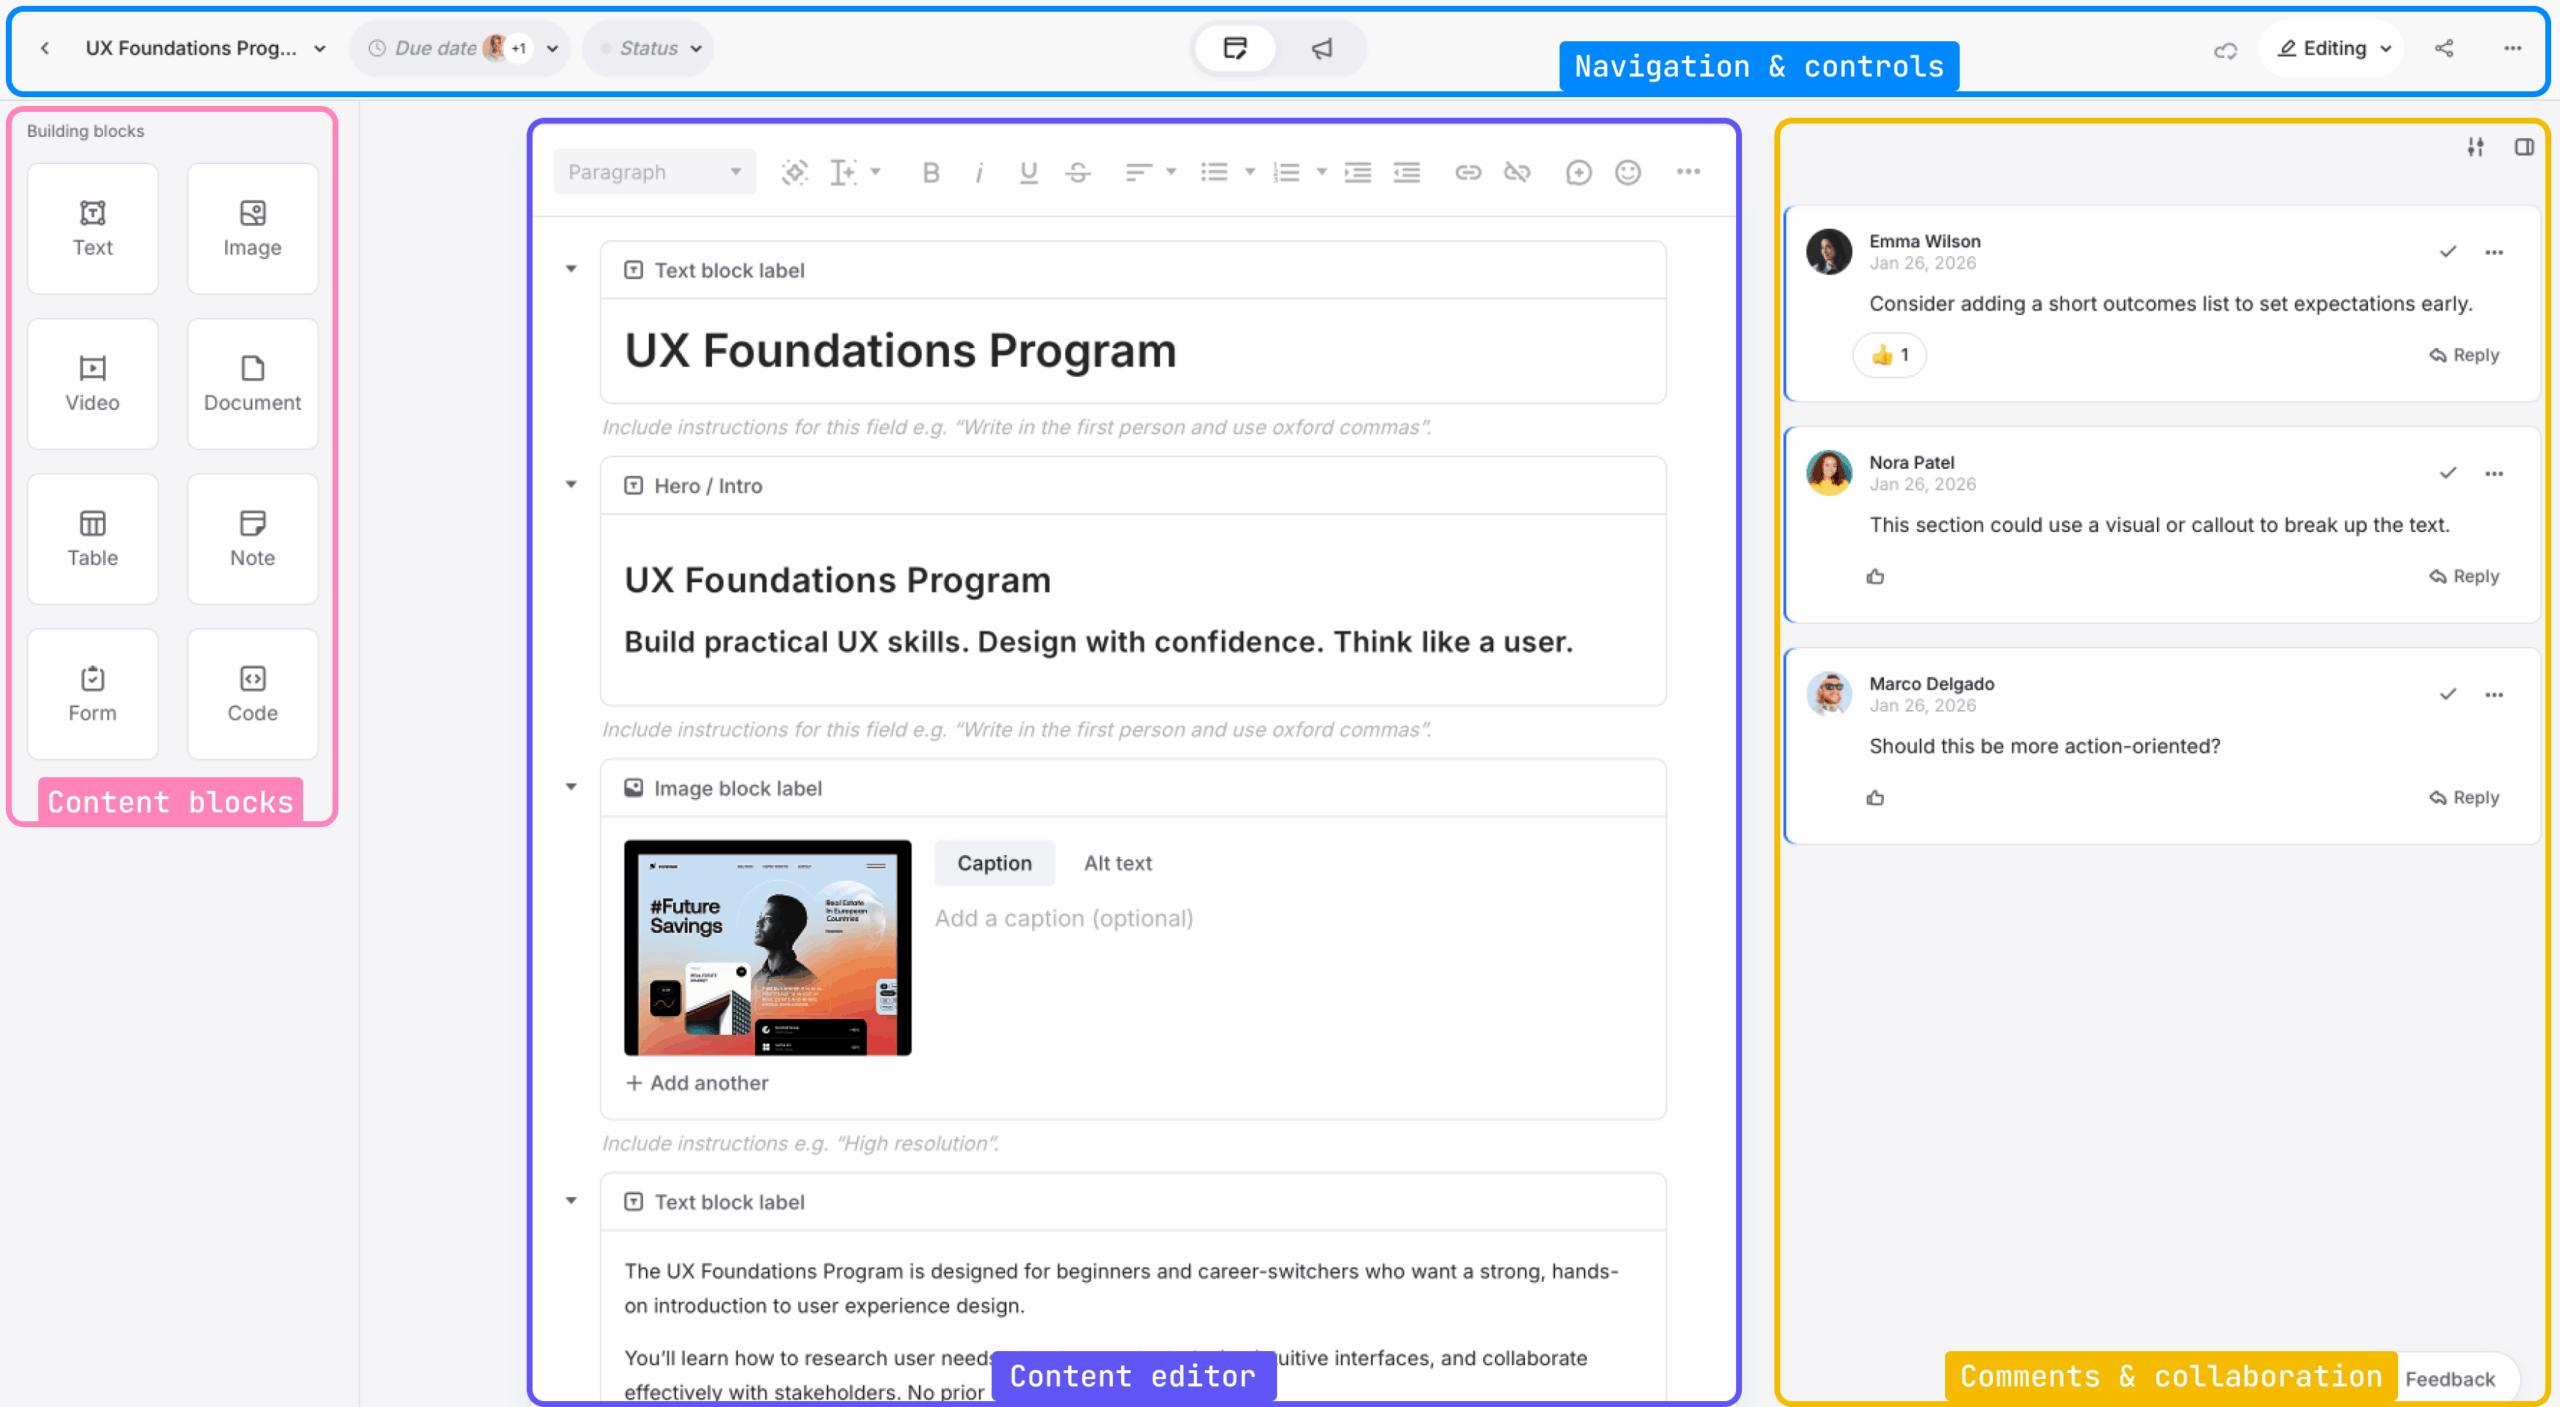
The Page Editor has four main areas: navigation and page controls at the top, content blocks on the left, the editing workspace in the center and comments and suggestions on the right.
Use navigation and page controls
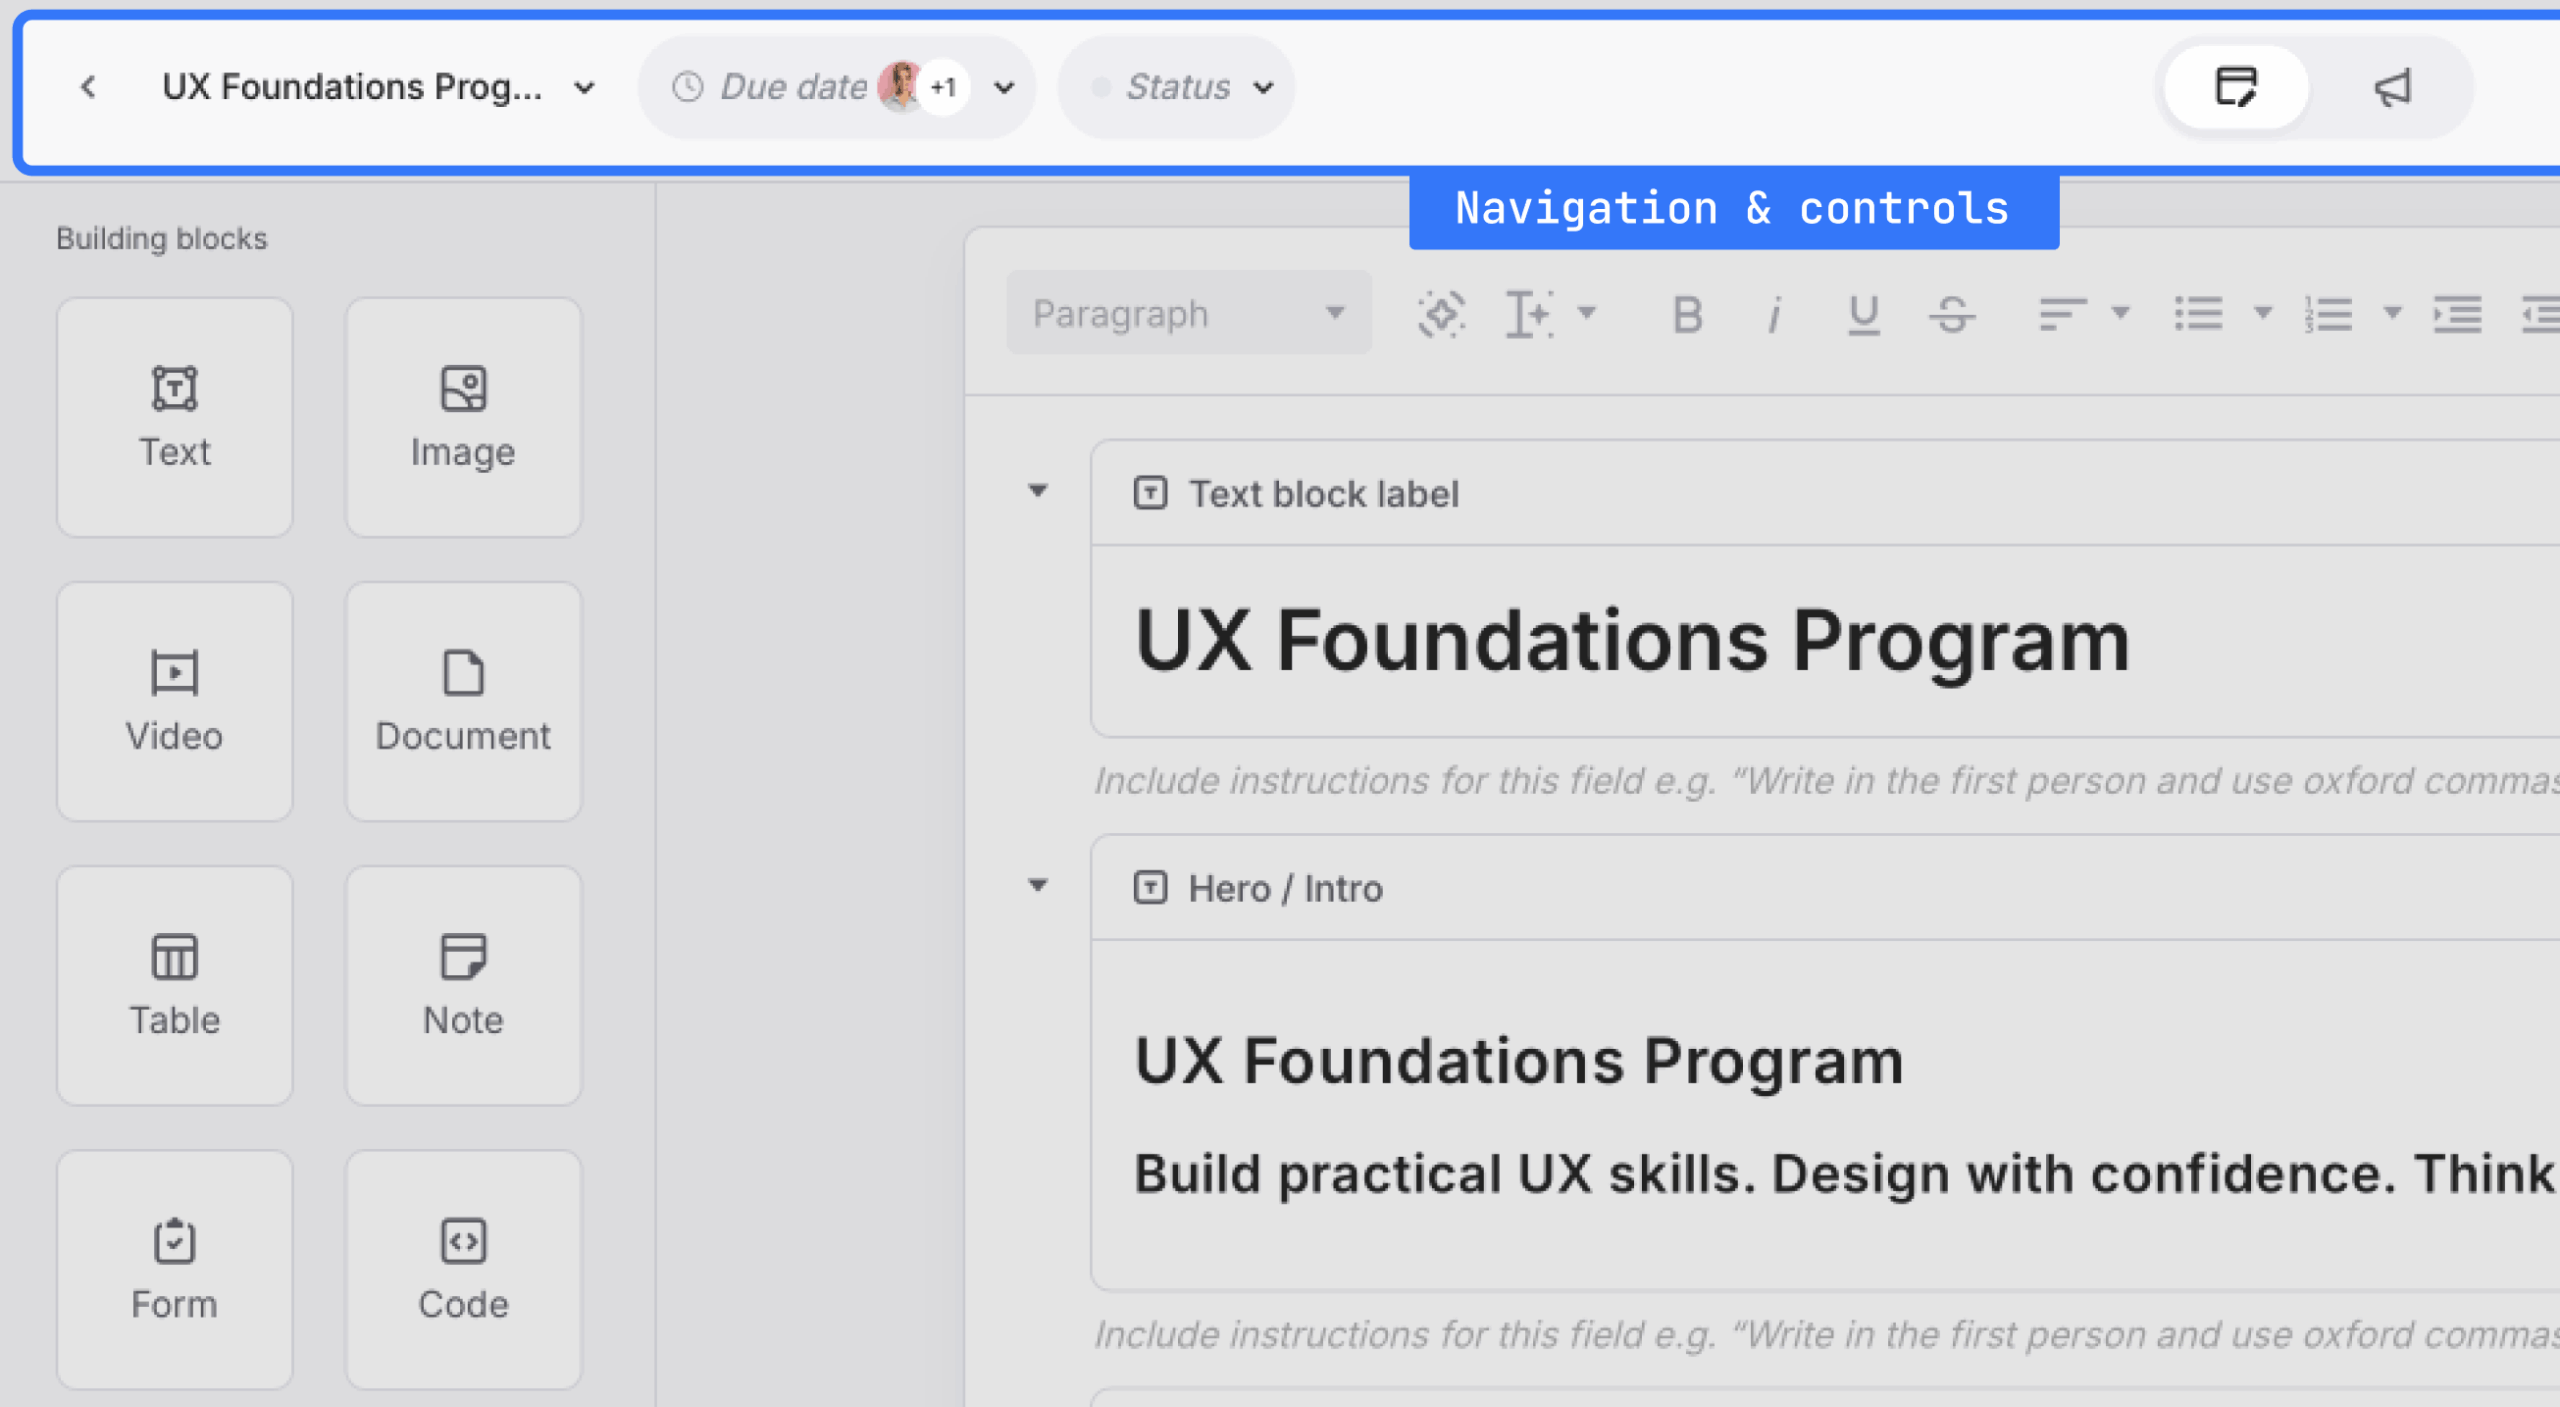
Select the back arrow in the upper-left corner to return to Content Overview. When you move the pointer over the arrow, the Back to content tooltip appears.
The current page name appears beside the back arrow. Select the down arrow beside the page name to open the page list, then select another page to switch pages without returning to Content Overview.
The top bar also includes controls for the page due date, assignee and workflow status. In the center, switch between Content View and SEO View. On the right, choose Editing or Suggesting mode and use Share Preview when you need to share the page preview.
For details about the settings available in SEO View, see SEO settings overview.
Add a content block
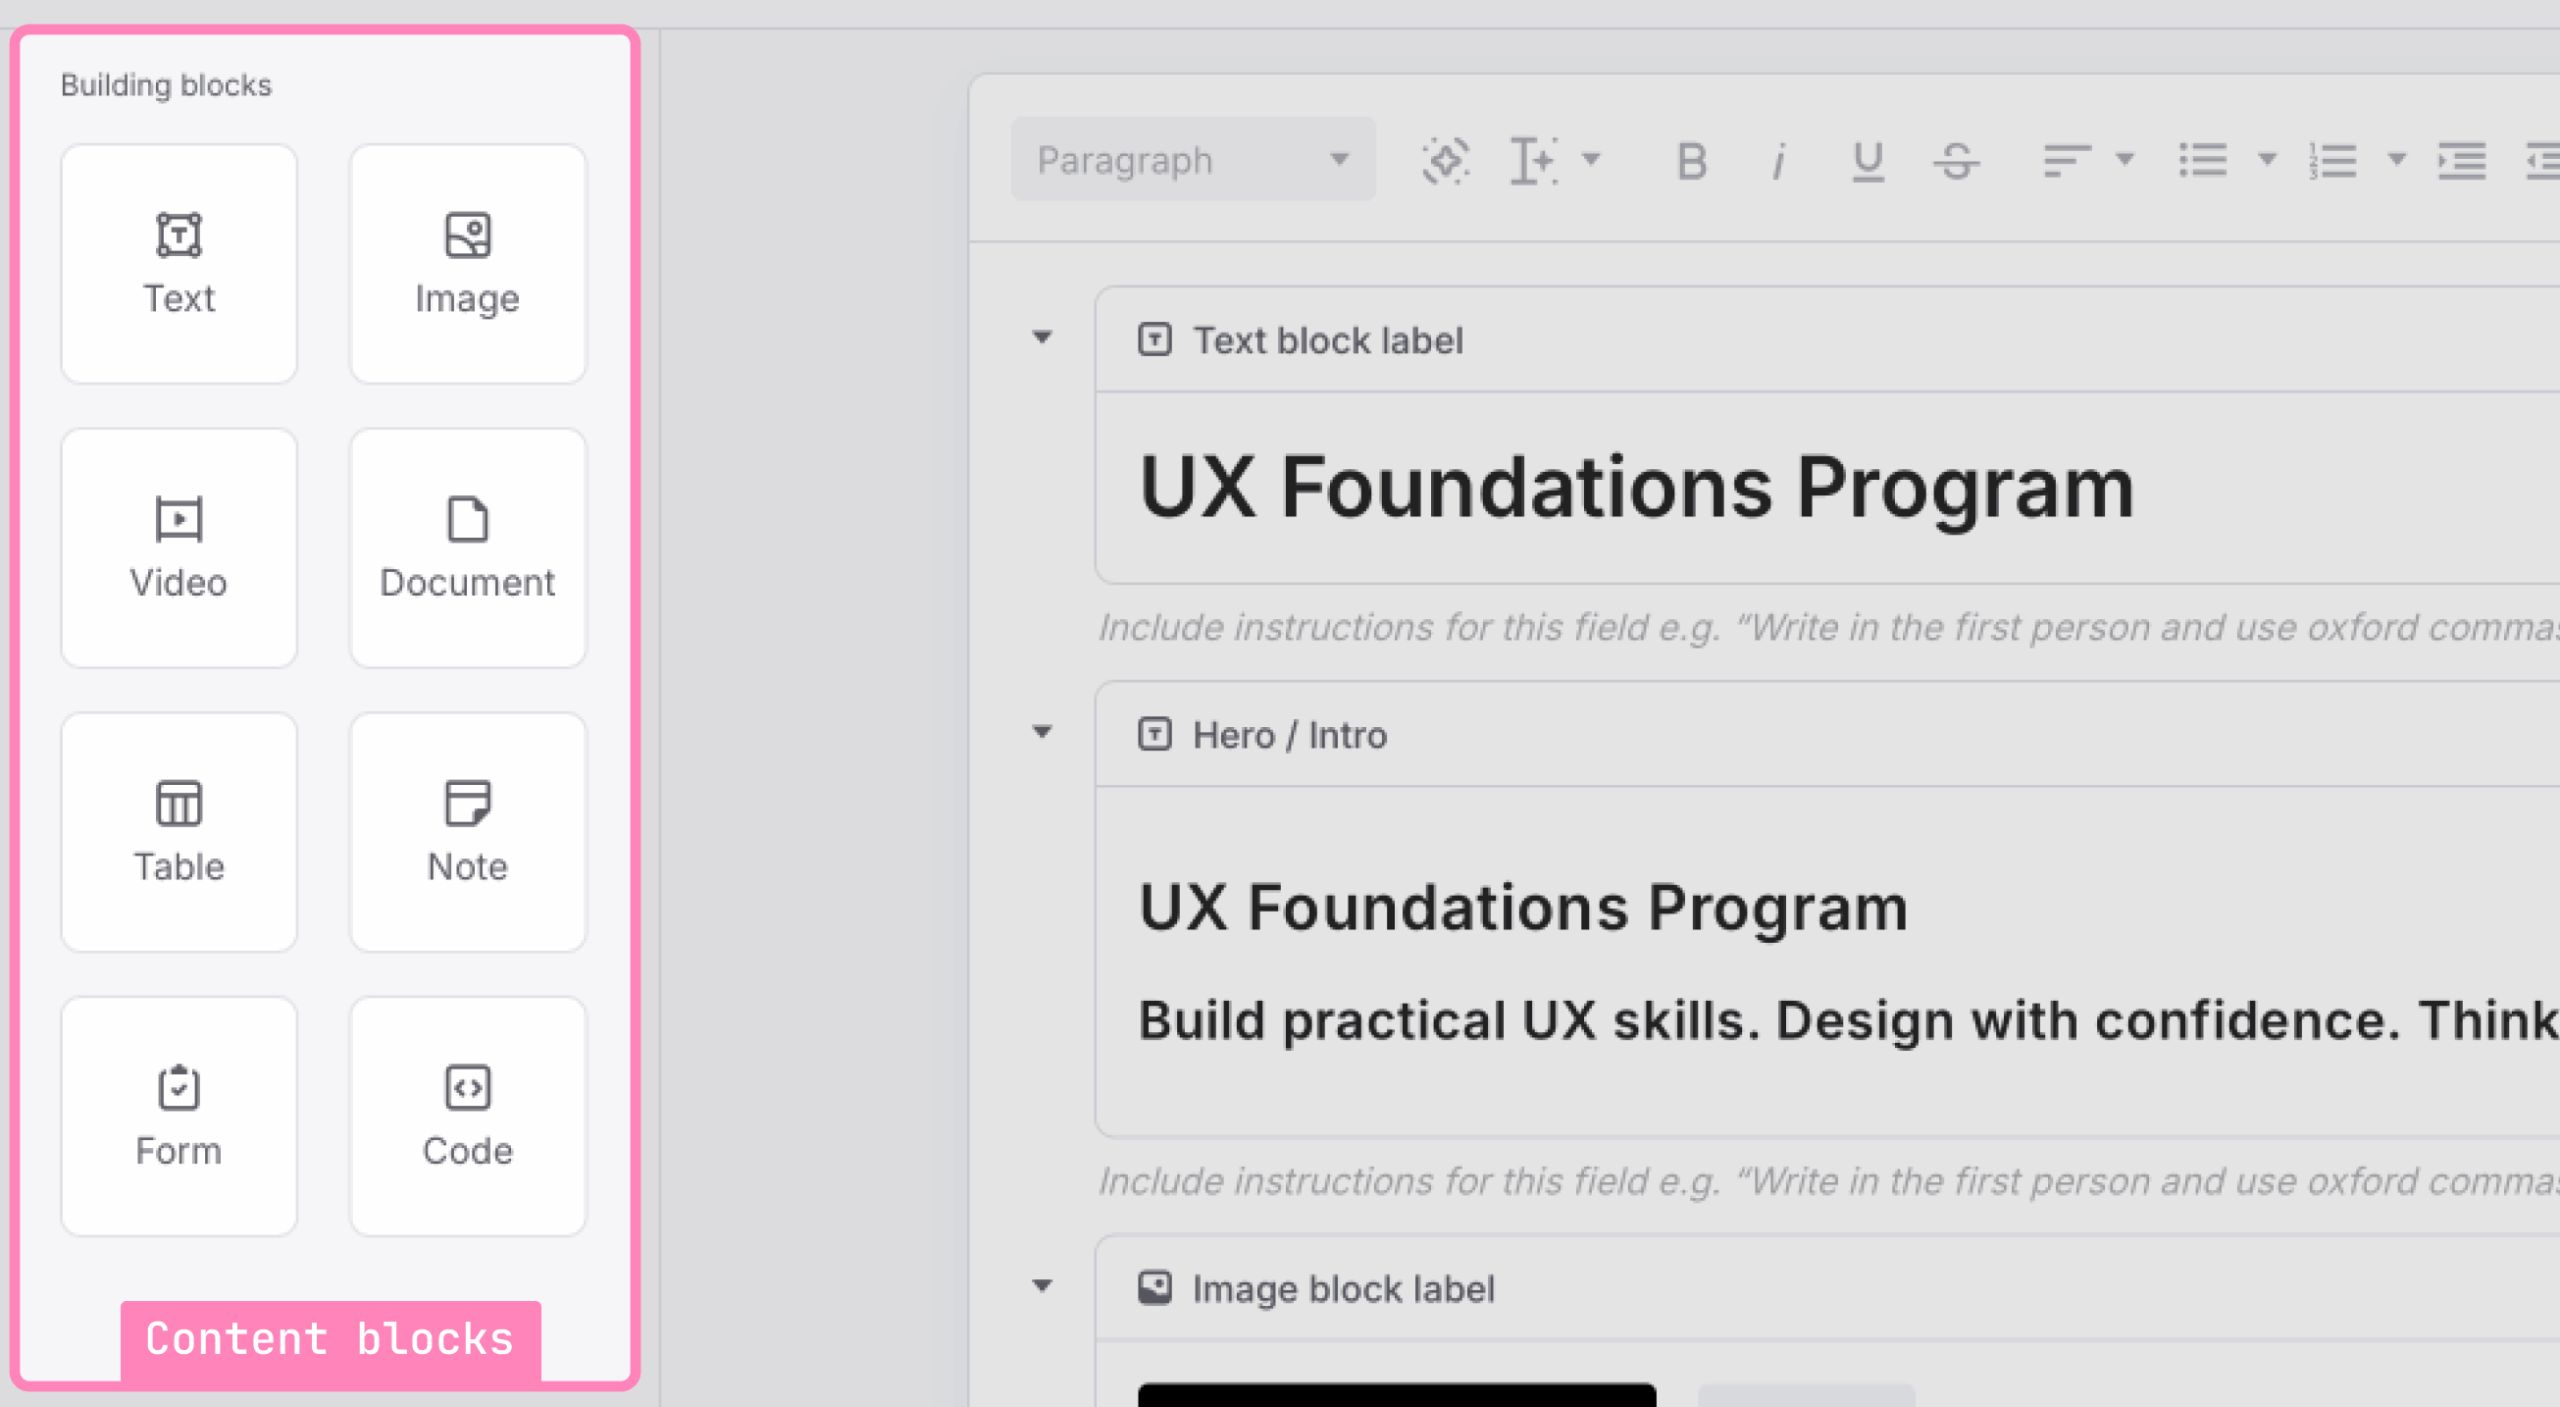
Use the content block panel on the left to add the type of content you need. Available blocks include Text, Image, Video, Document, Table, Note, Form and Code.
- Select a content block to add it below the existing blocks on the page.
- Add your content to the block.
- To move the block, drag its handle on the right and place it above, below or between the other blocks.
Edit and arrange page content
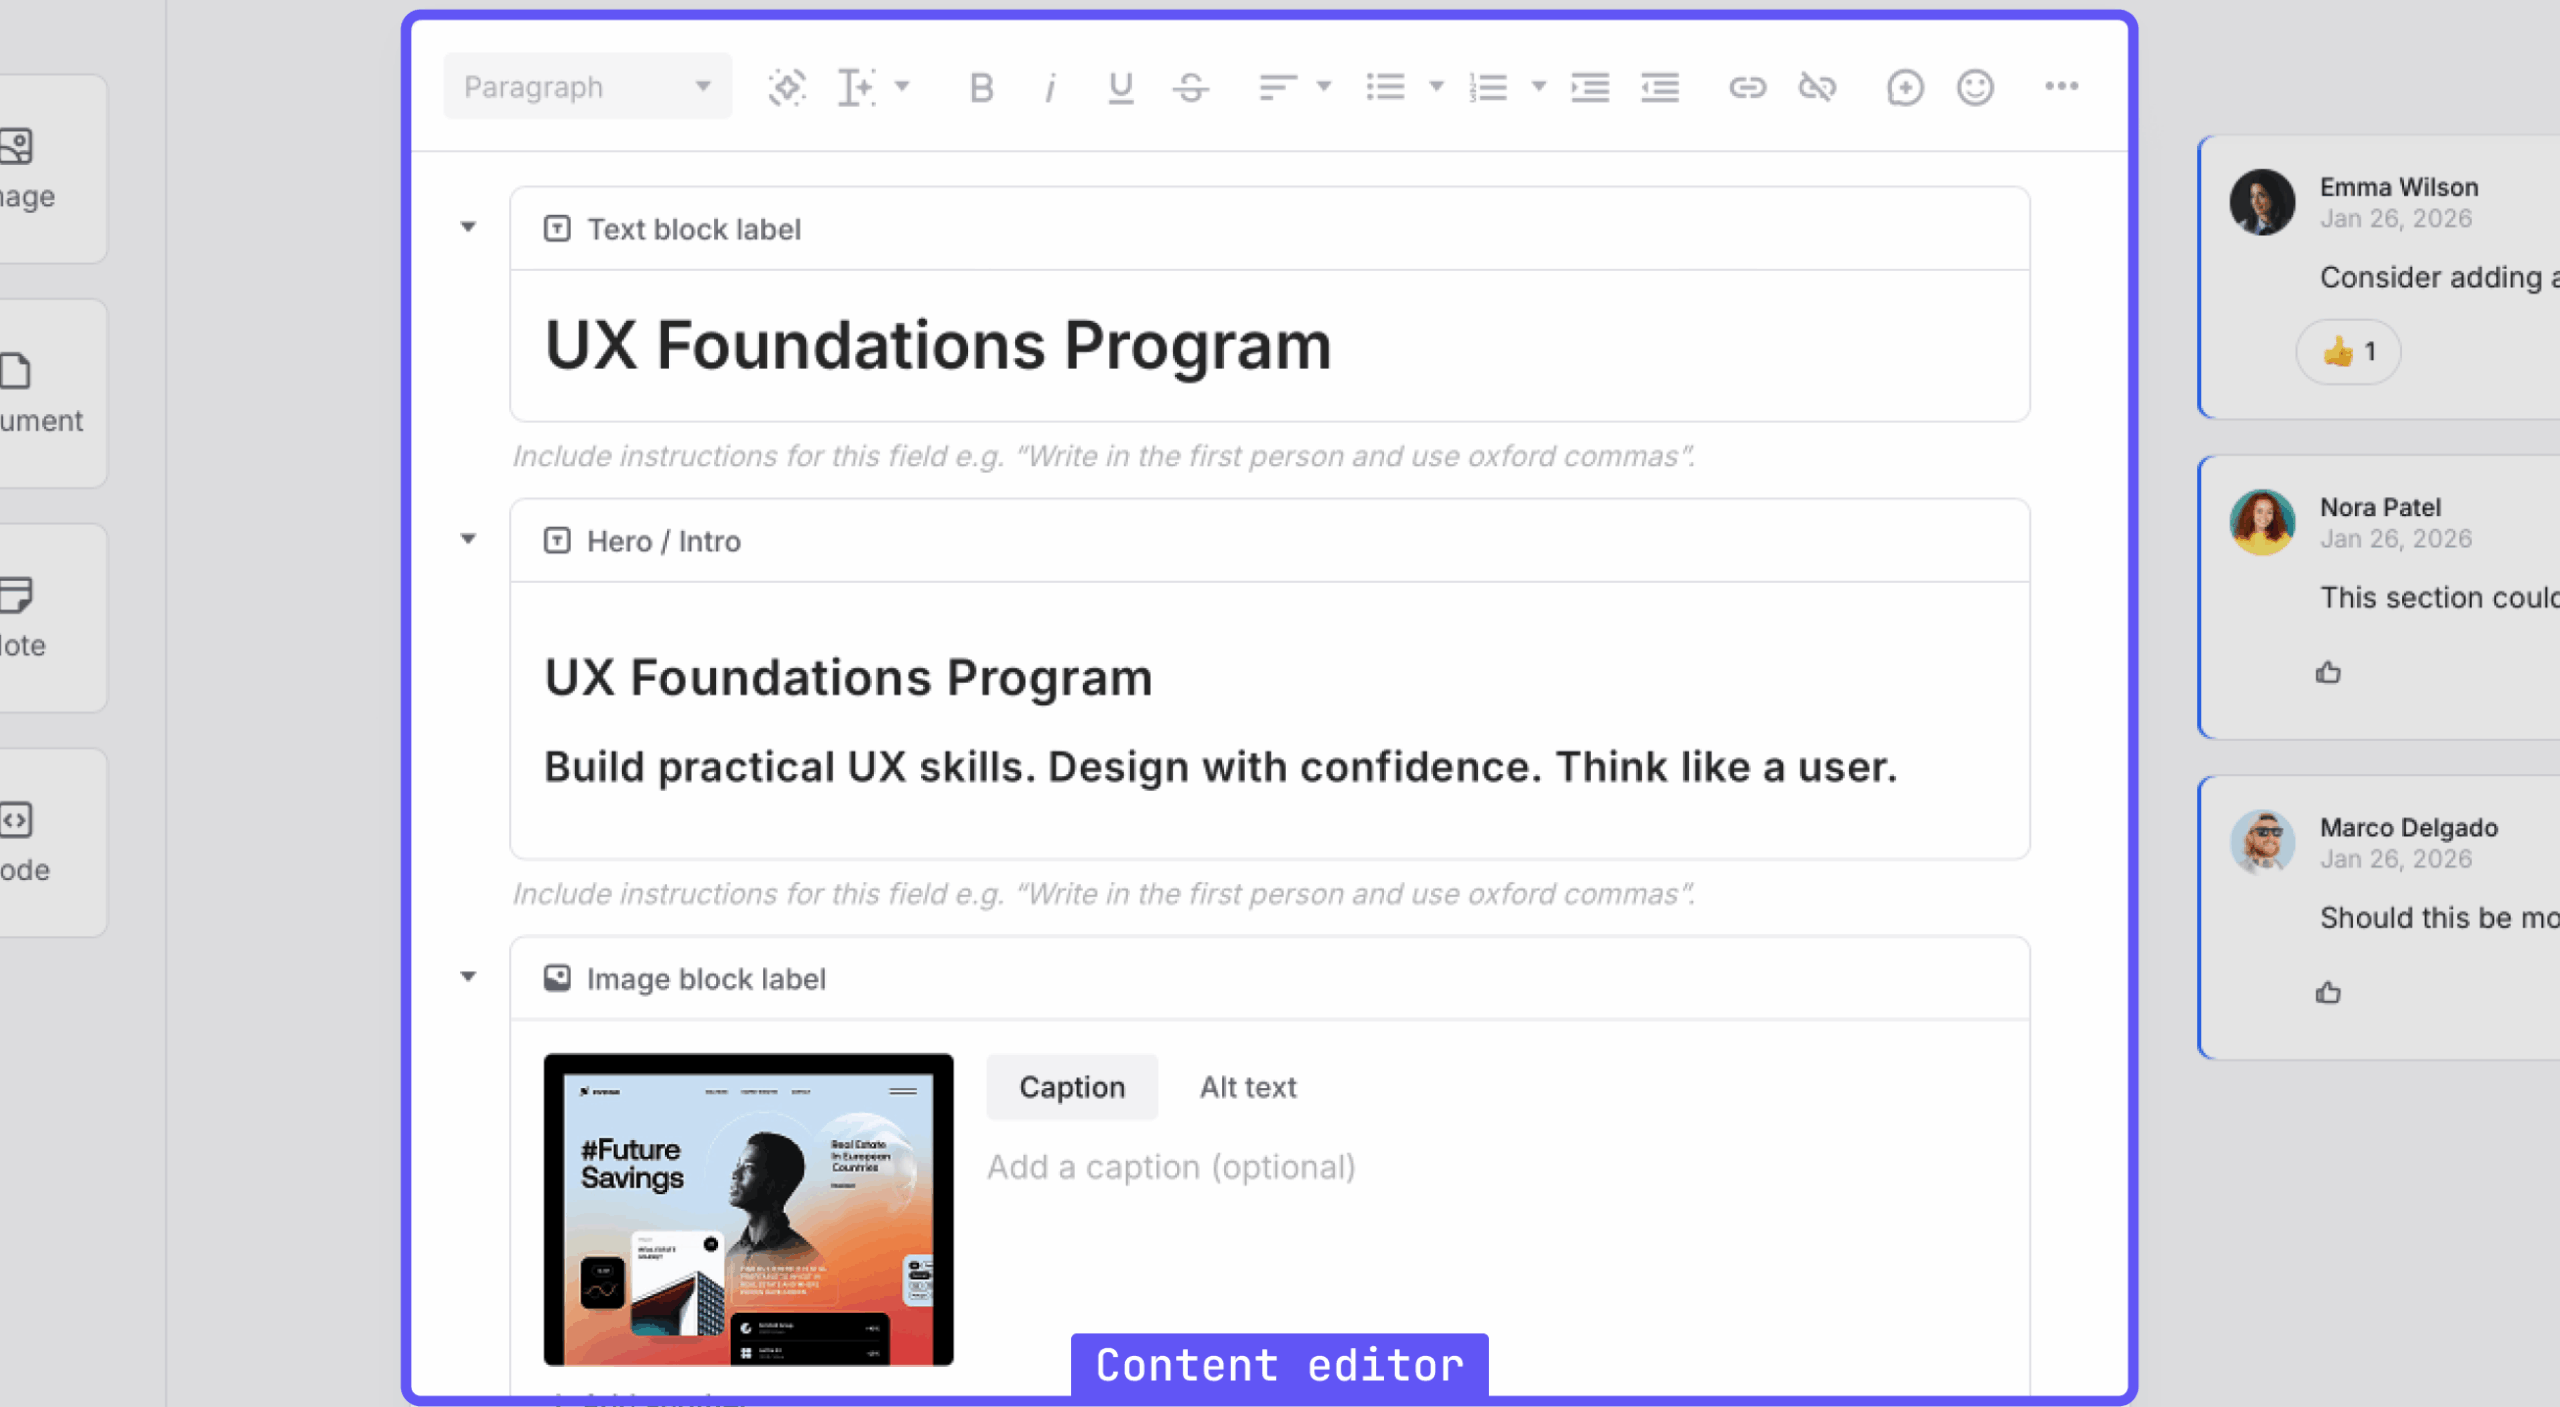
The center of the Page Editor is where you create and arrange content. When the page is editable, the formatting toolbar appears at the top of the editing area. Use it to format text and access the tools available for the selected block.
Select a block to edit its content. You can also add block instructions and labels or open its settings when you need more control over how the content is entered and displayed. For advanced options such as content limits and HTML wrappers, see Content block settings.
When working in a text block, you can use the AI writing assistant to draft or improve content in the editor.
Review comments and suggestions
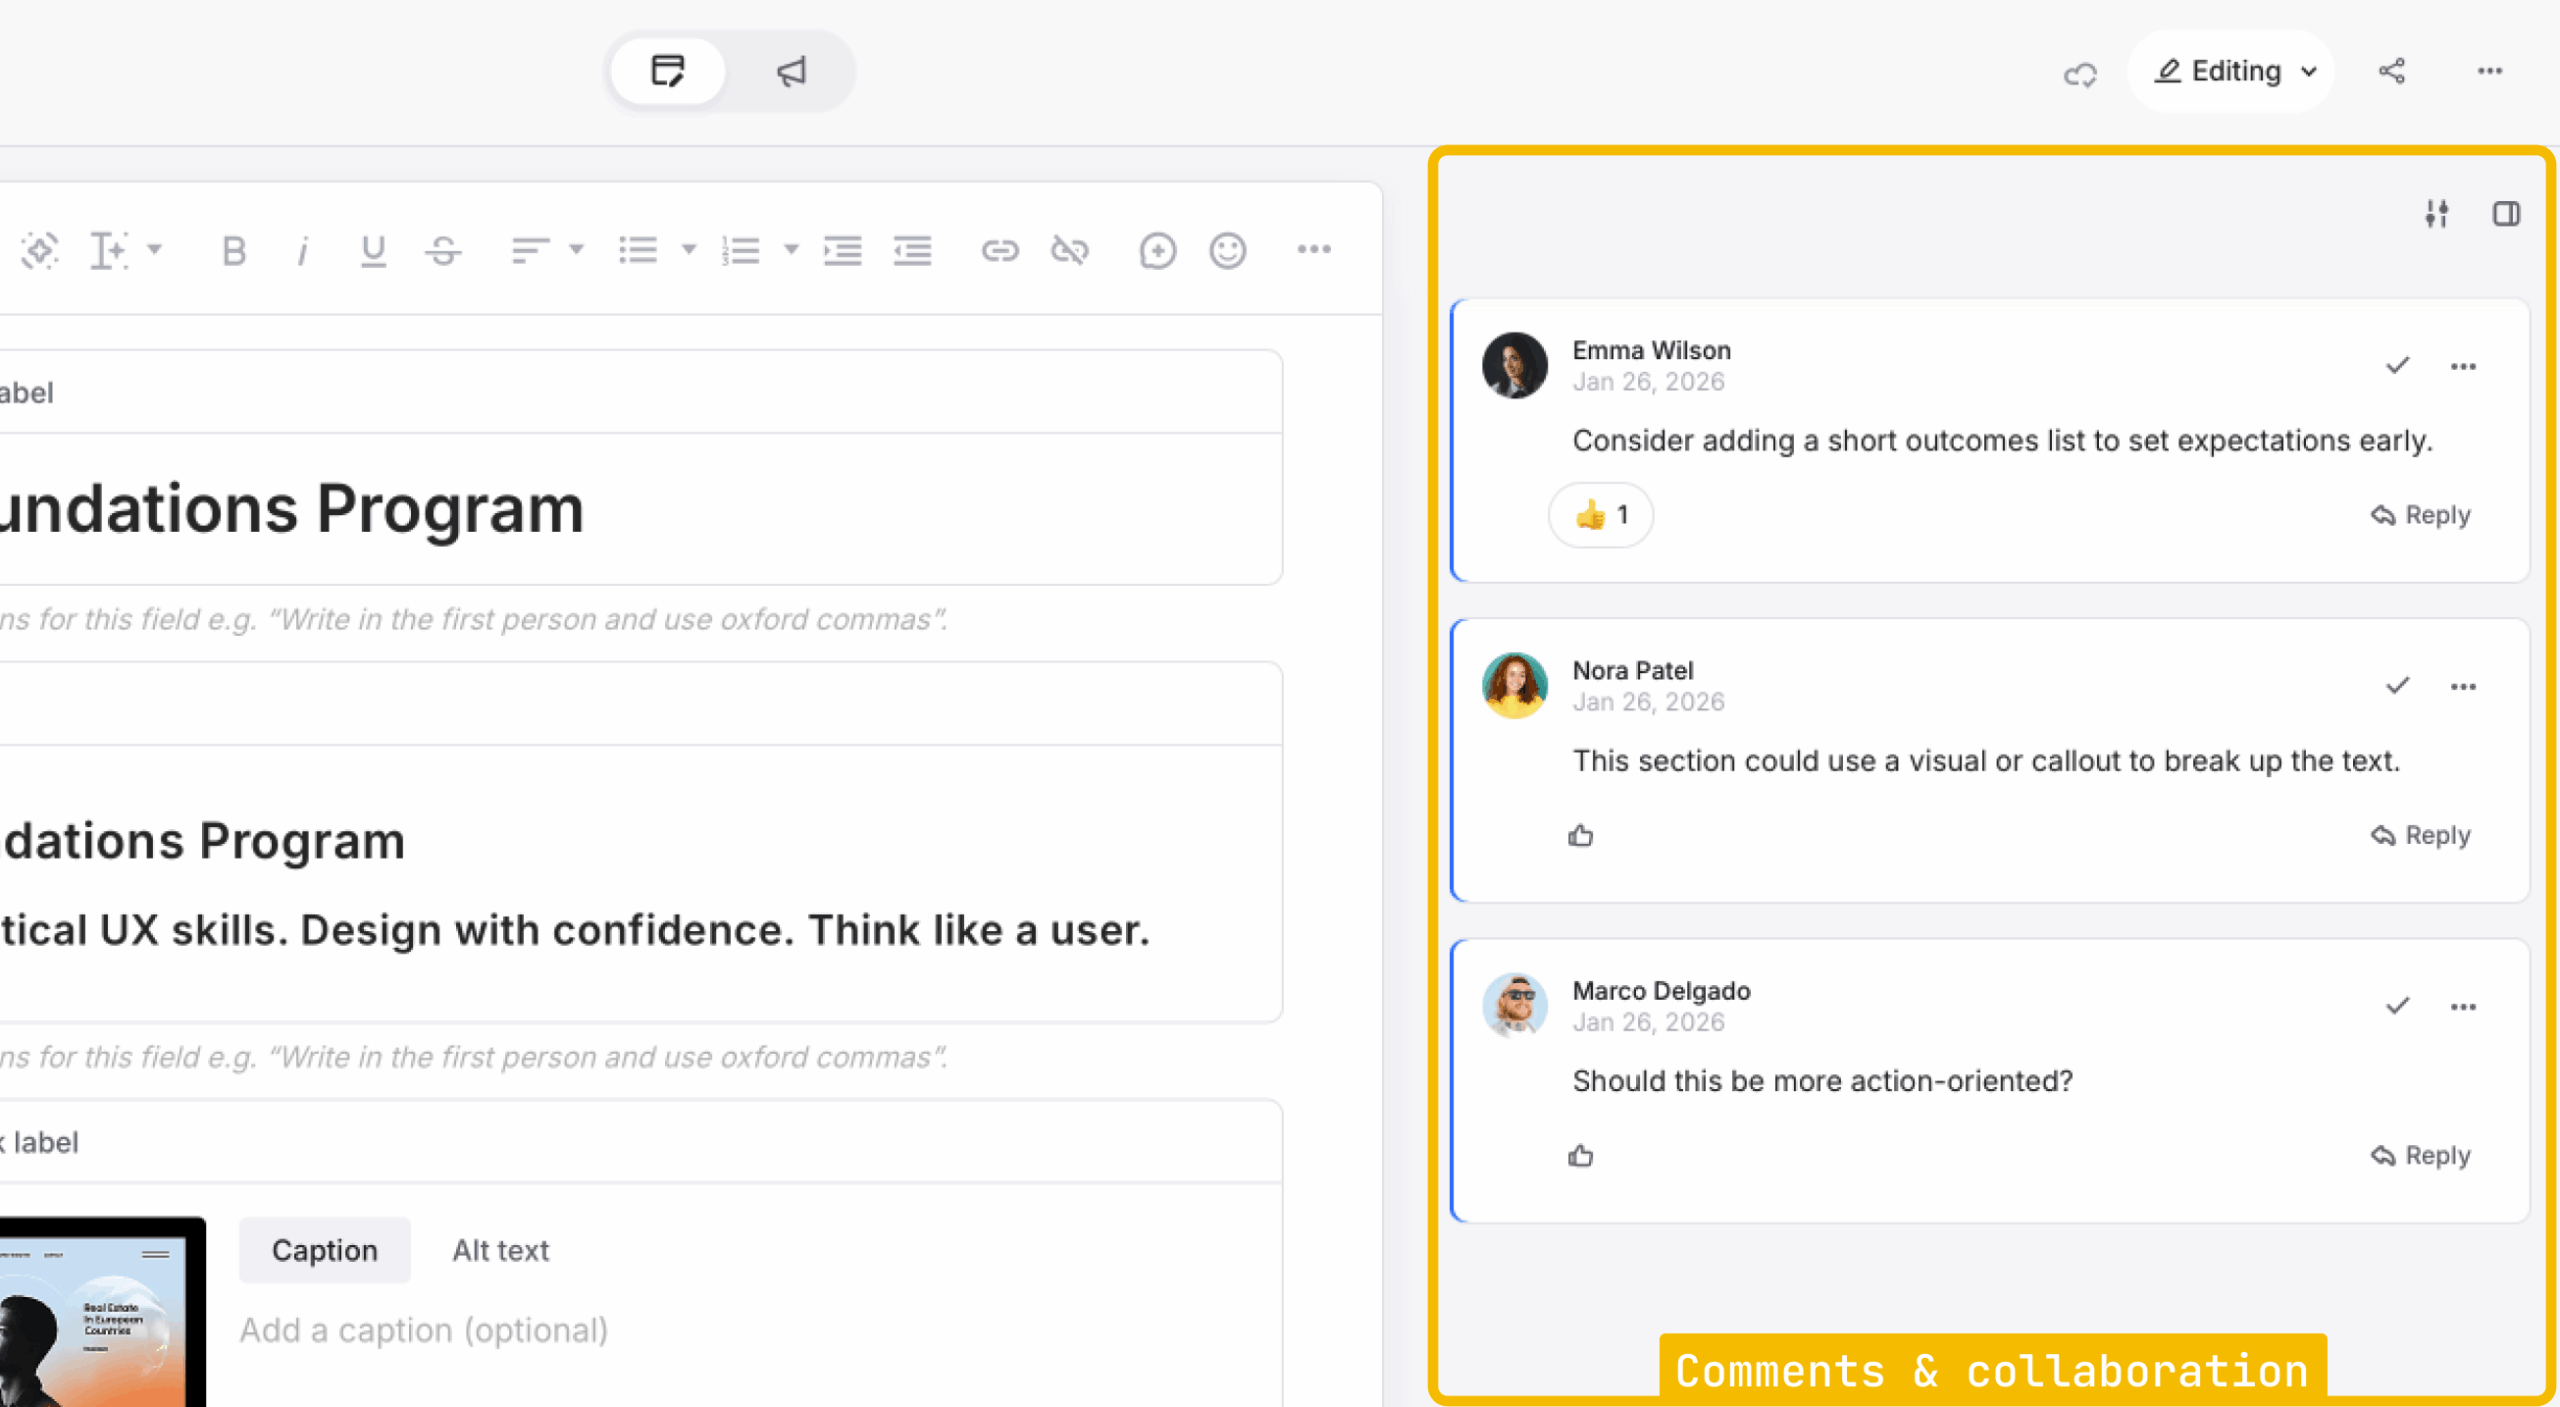
Comments, inline comments and suggested edits appear along the right side of the Page Editor. Use them to review feedback while keeping the related page content visible.
For detailed instructions, see Adding and managing inline comments and Using suggestive editing mode.
Continue working in the Page Editor
You can now identify the main areas of the Page Editor, move between pages, add a content block and begin editing and reviewing page content.