Update page statuses
Page statuses show where each page is in your workflow. You can change the status of one or more pages from Content Overview, Content Calendar, Page Editor or Sitemap Builder. The selected status is reflected across the project.
Availability: Page workflow statuses are available during the free trial and on Pro, Team and Agency plans. They are not available on Free or Basic plans.
Before you begin
Owners, Admins and Project Managers can change page statuses. Contributors and Writers can change the status of pages assigned to them. Commentators cannot change page statuses.
For complete details on roles and permissions, see User roles and permissions in Slickplan.
Change a page status from Content Overview
- From the Sitemap, select Content to open Content Overview.
- Find the page you want to update.
- In the Status column, select the page’s current status. Pages without another selected status display Unassigned.
- Select the new status.
The status applies immediately.
Change the status of multiple pages
- In Content Overview, select the checkboxes beside the pages you want to update.
- In the bottom drawer, select Status.
- Select the status you want to apply.
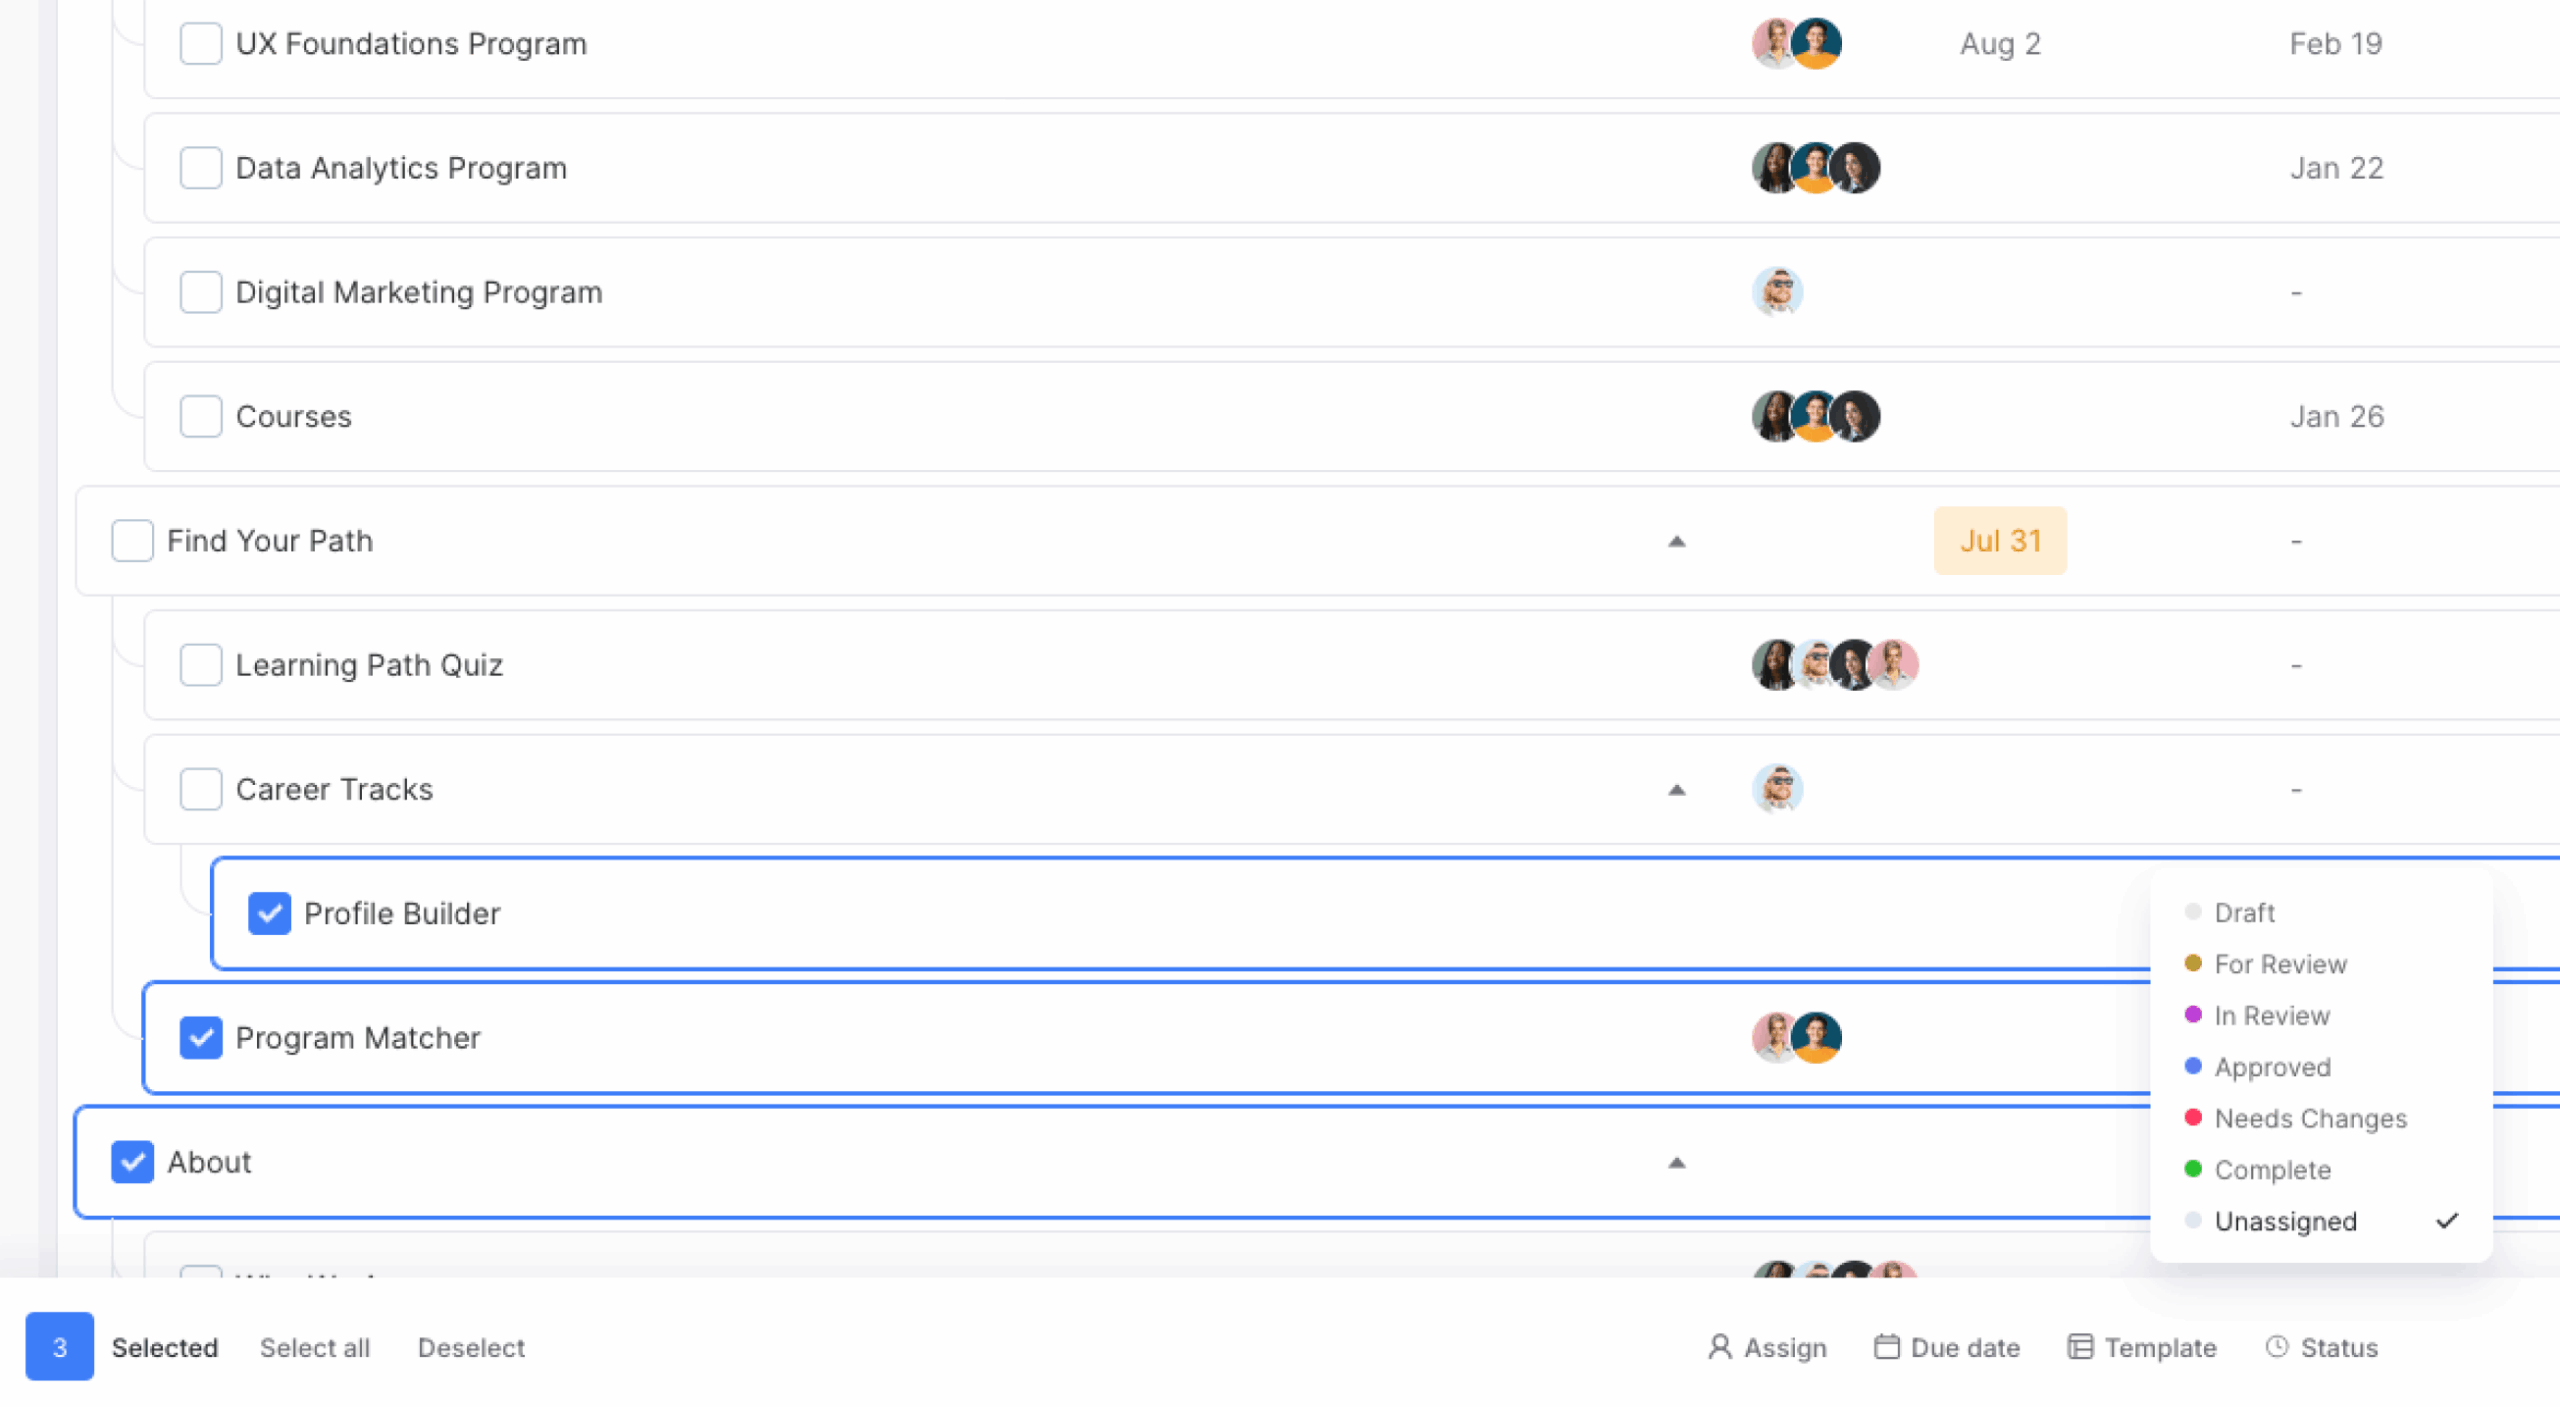
The status applies immediately to every selected page. Select Done to close the bottom drawer and clear the selection. Done does not submit or apply pending changes.
Change a page status from Content Calendar
- From Content Overview, select Calendar.
- Select the page in the calendar. Only pages with due dates appear in Content Calendar.
- At the top of the quick-action popup, select the page’s current status.
- Select another status from the list.
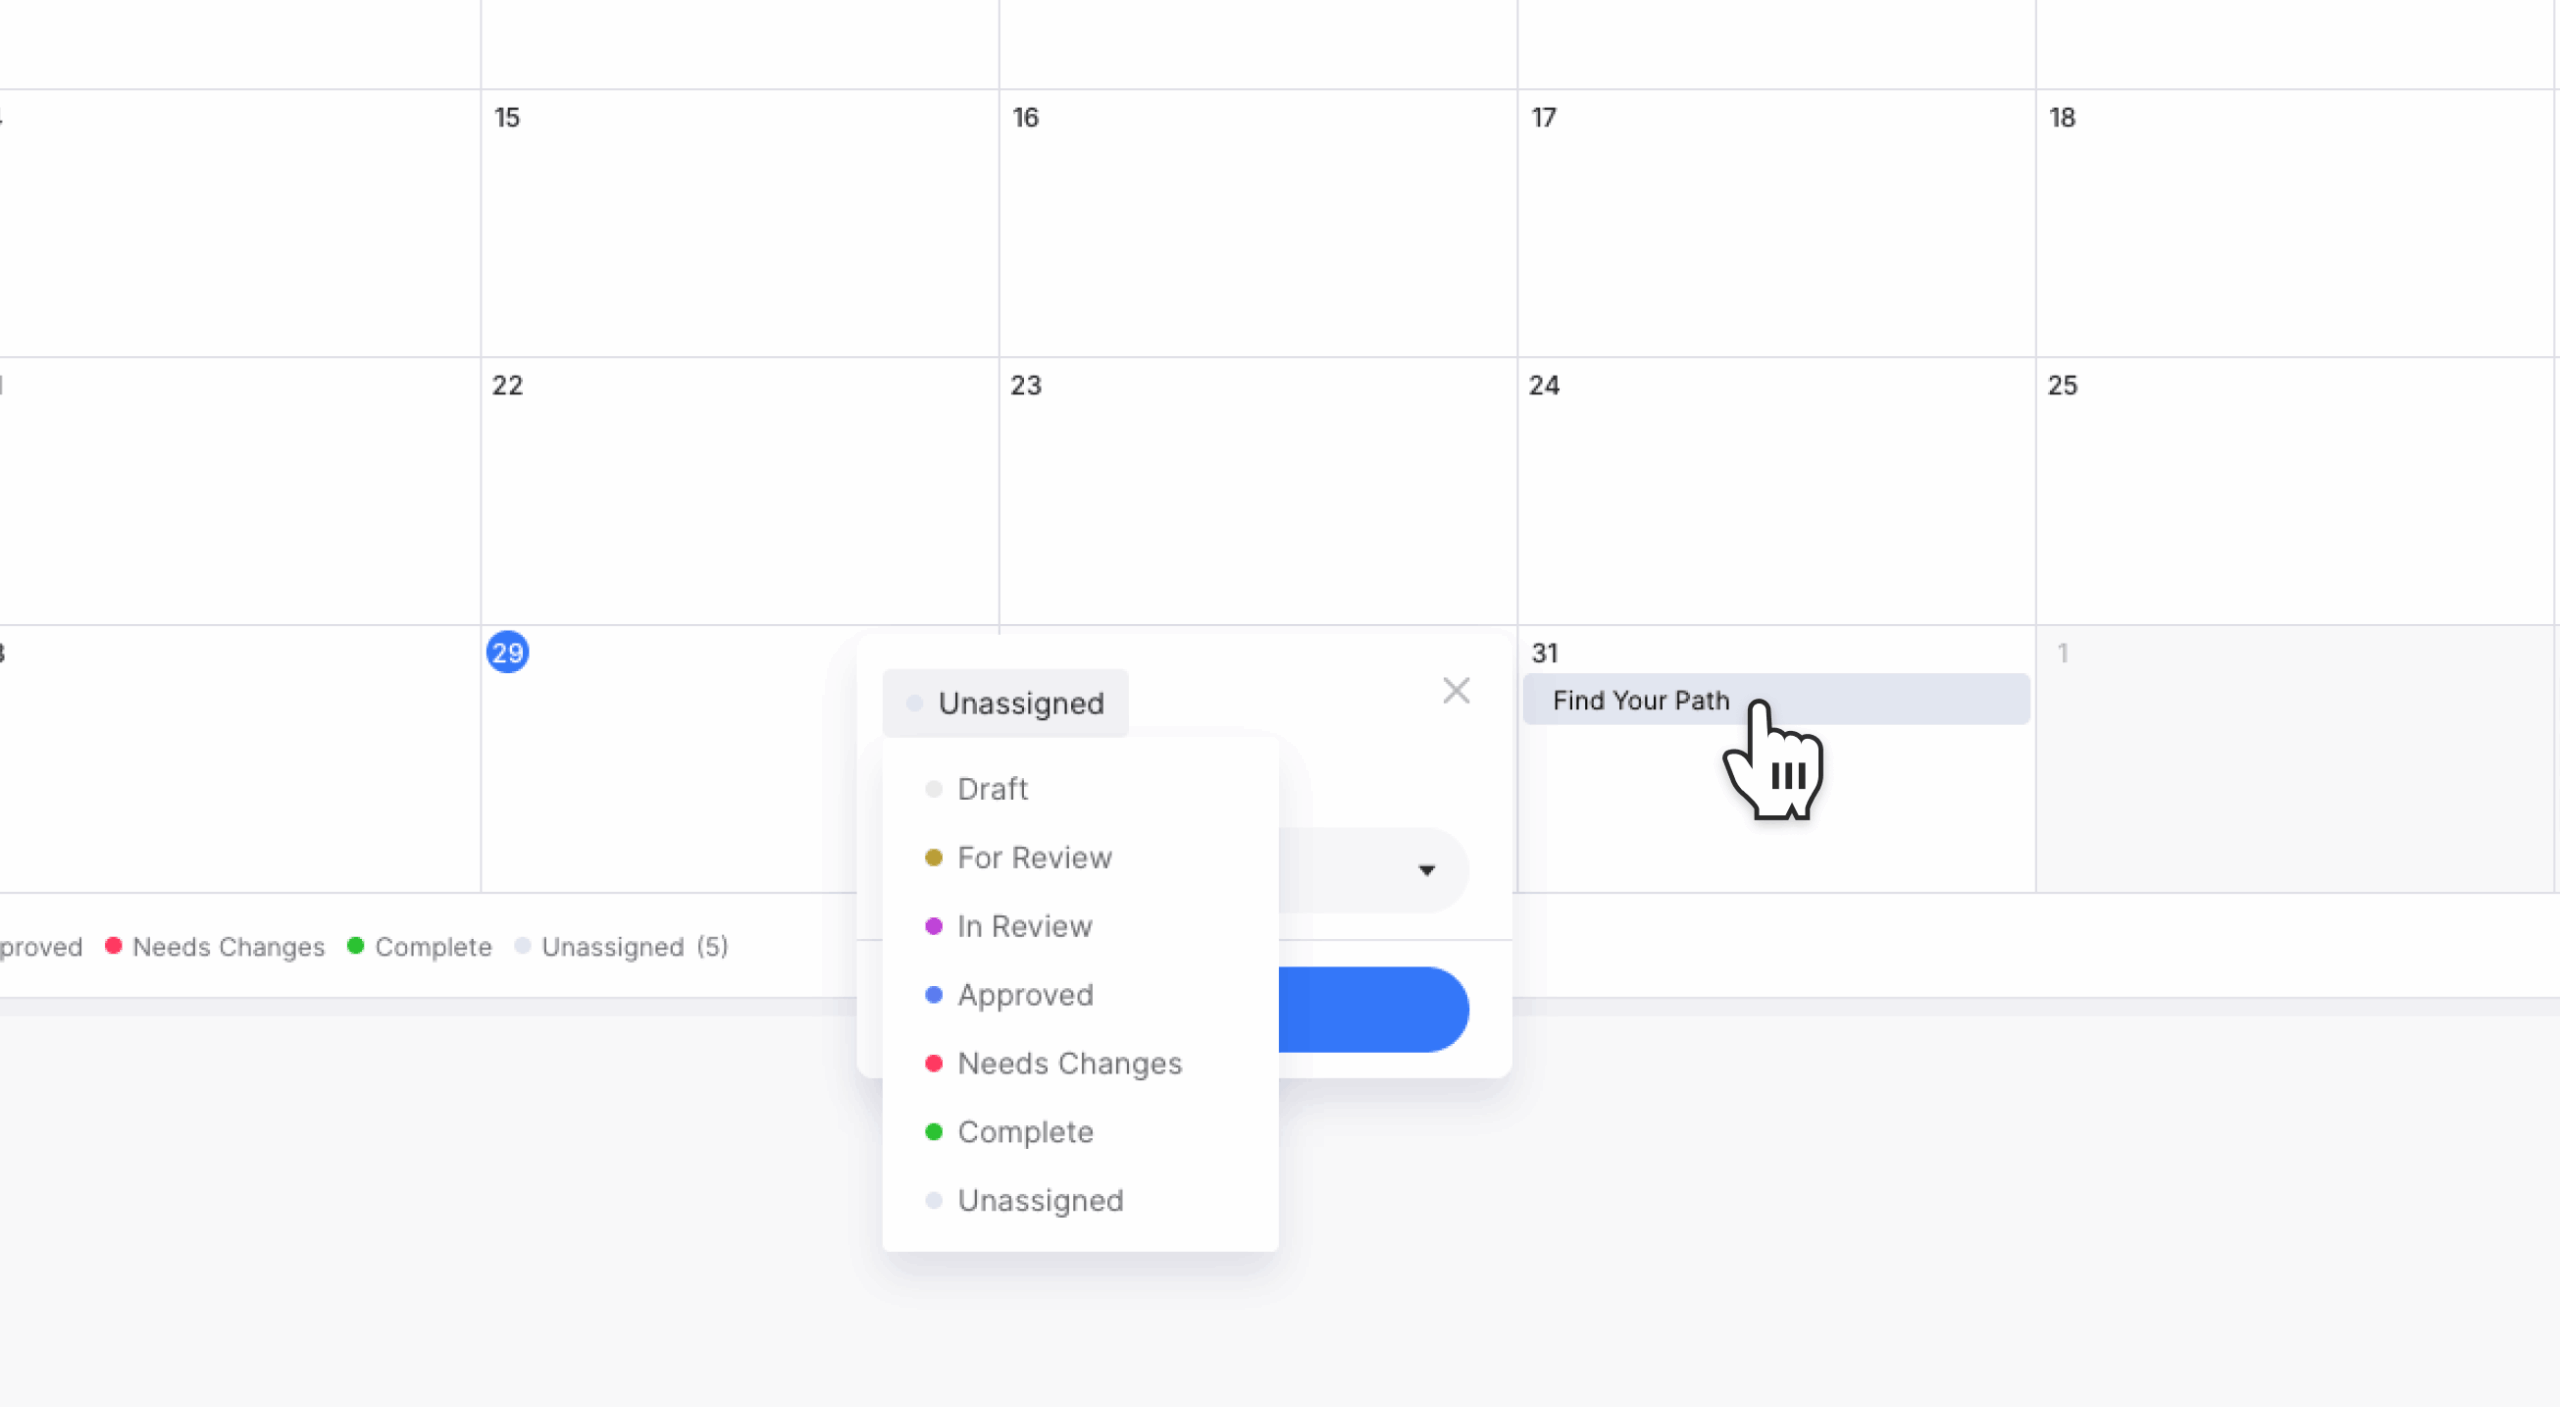
The status applies immediately, and the page’s calendar bar changes to the corresponding status color. Select outside the popup or close it when you are finished.
Change a page status from Page Editor
- Open the page in Page Editor.
- In the upper-left toolbar, select the status pill. When the page uses Unassigned, the pill displays Status with a gray dot.
- Select another status from the list.
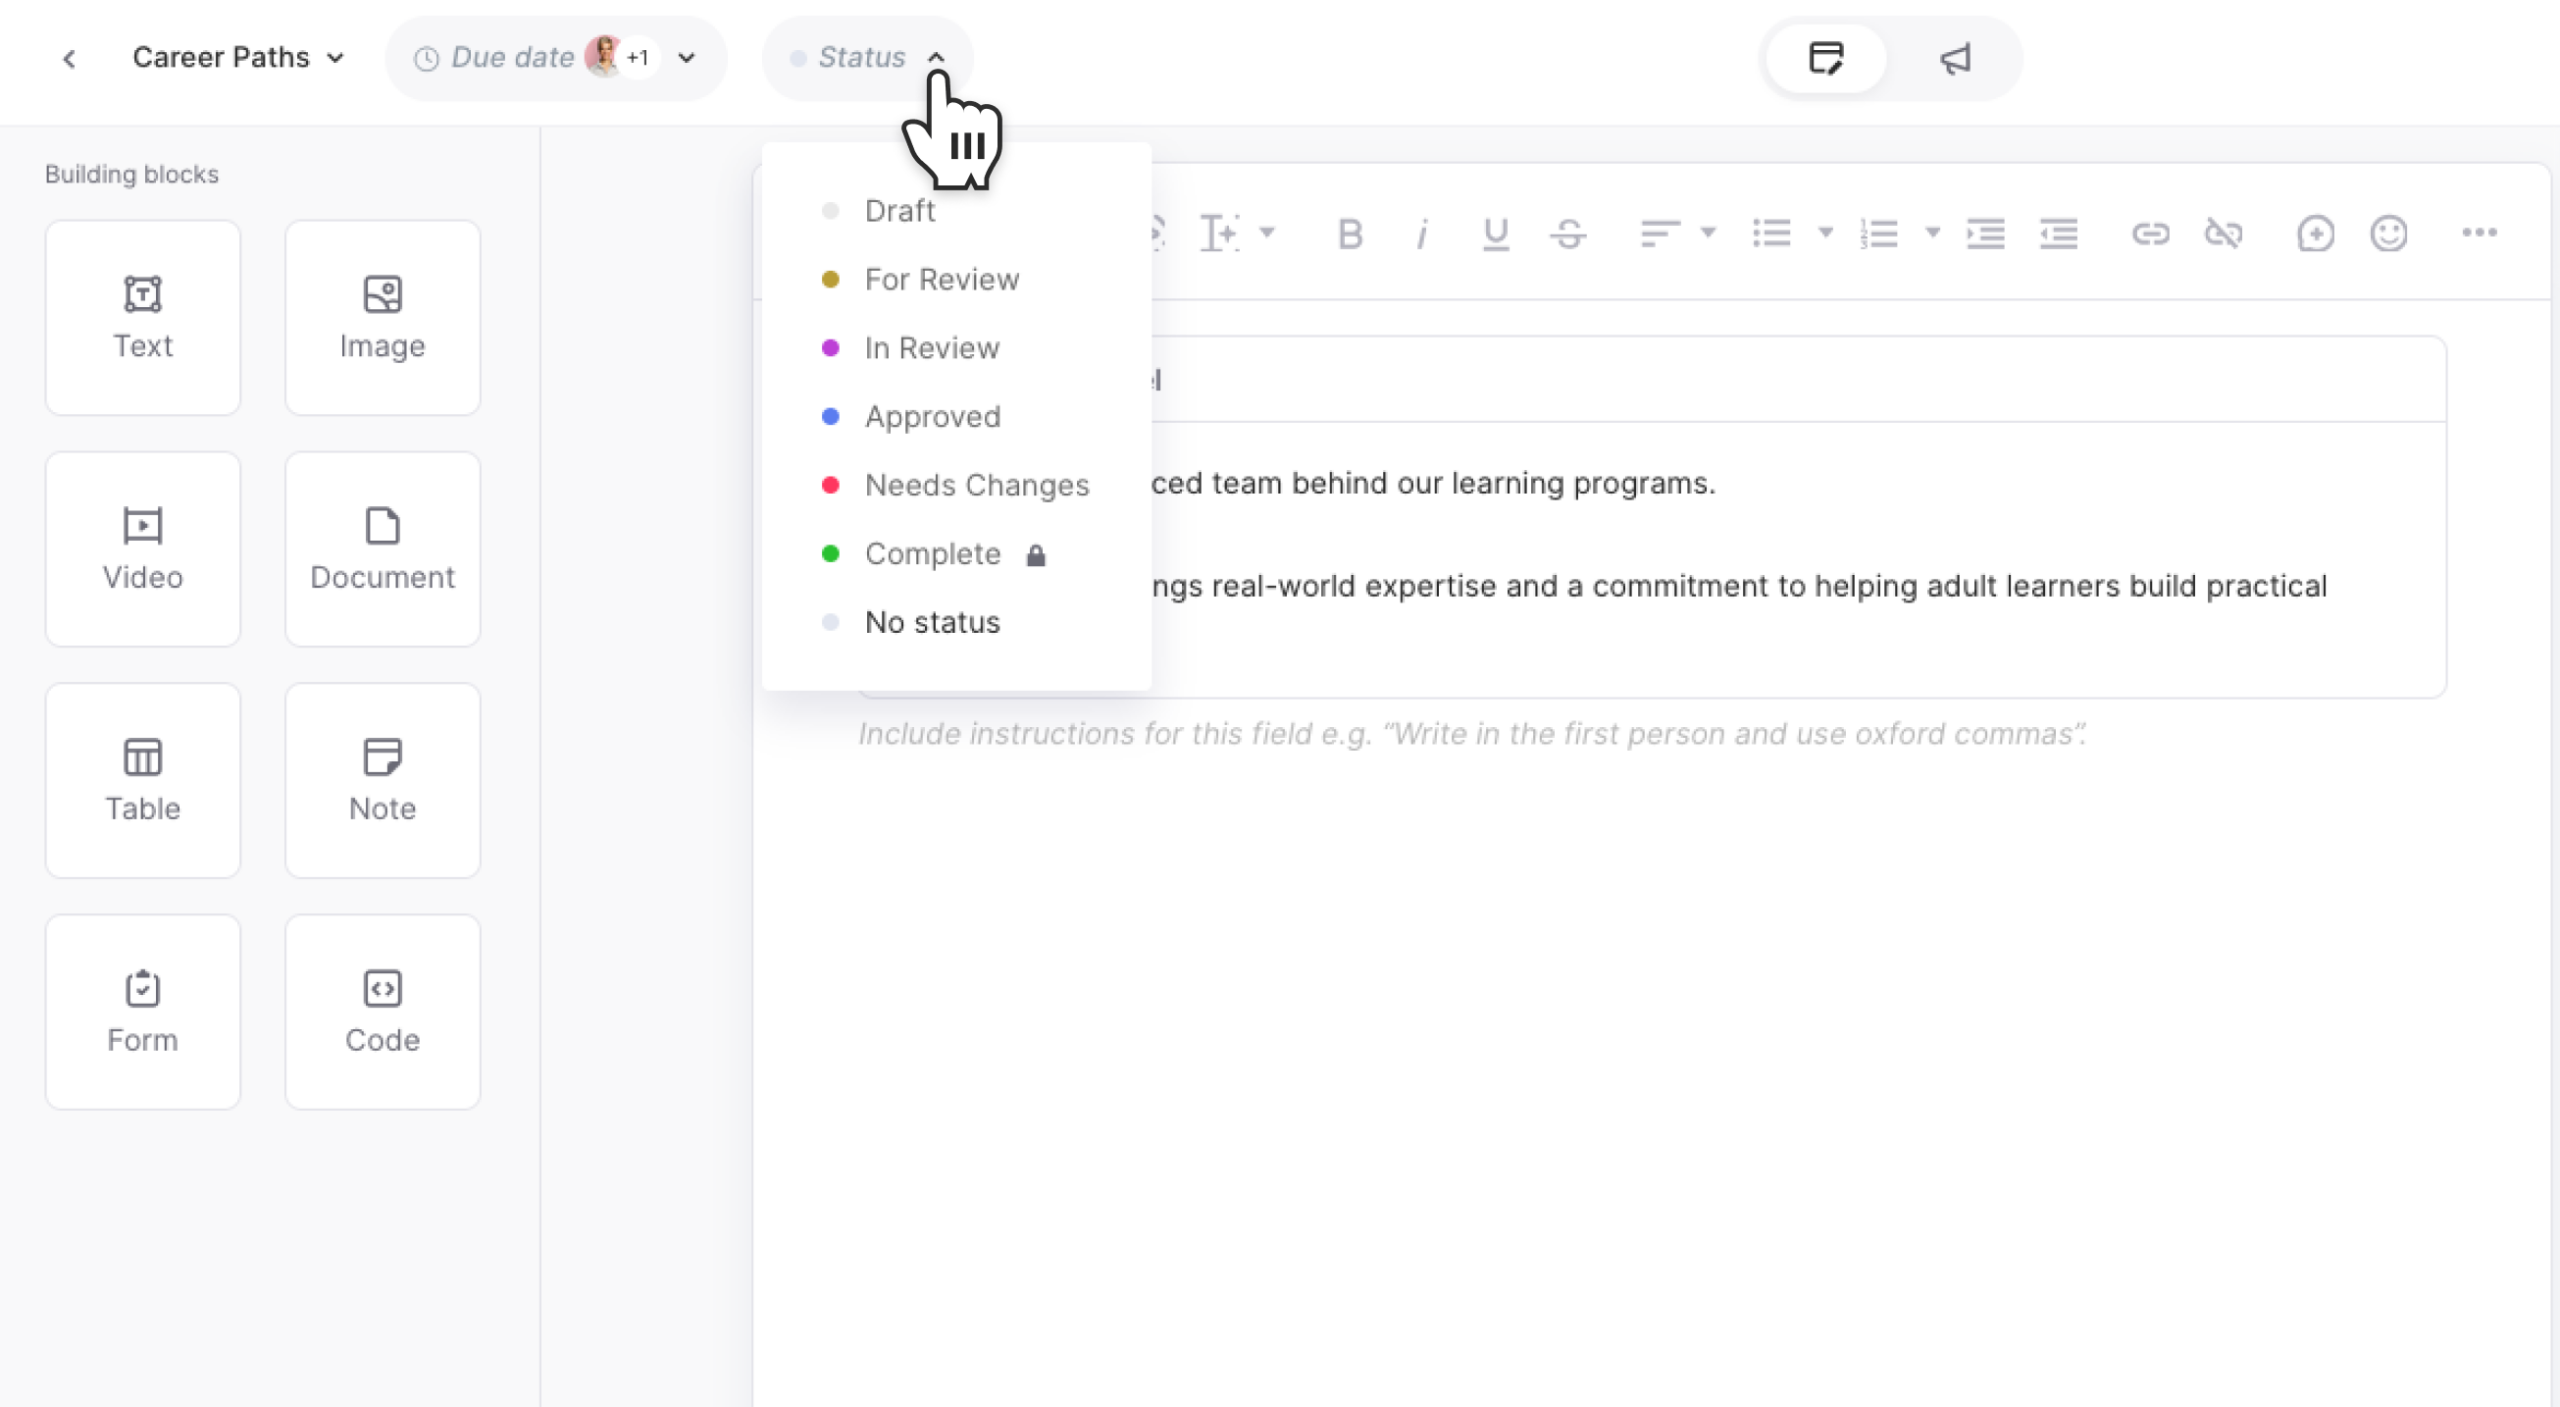
The status applies immediately. The pill updates to display the selected status color and name. No additional save or confirmation action is required.
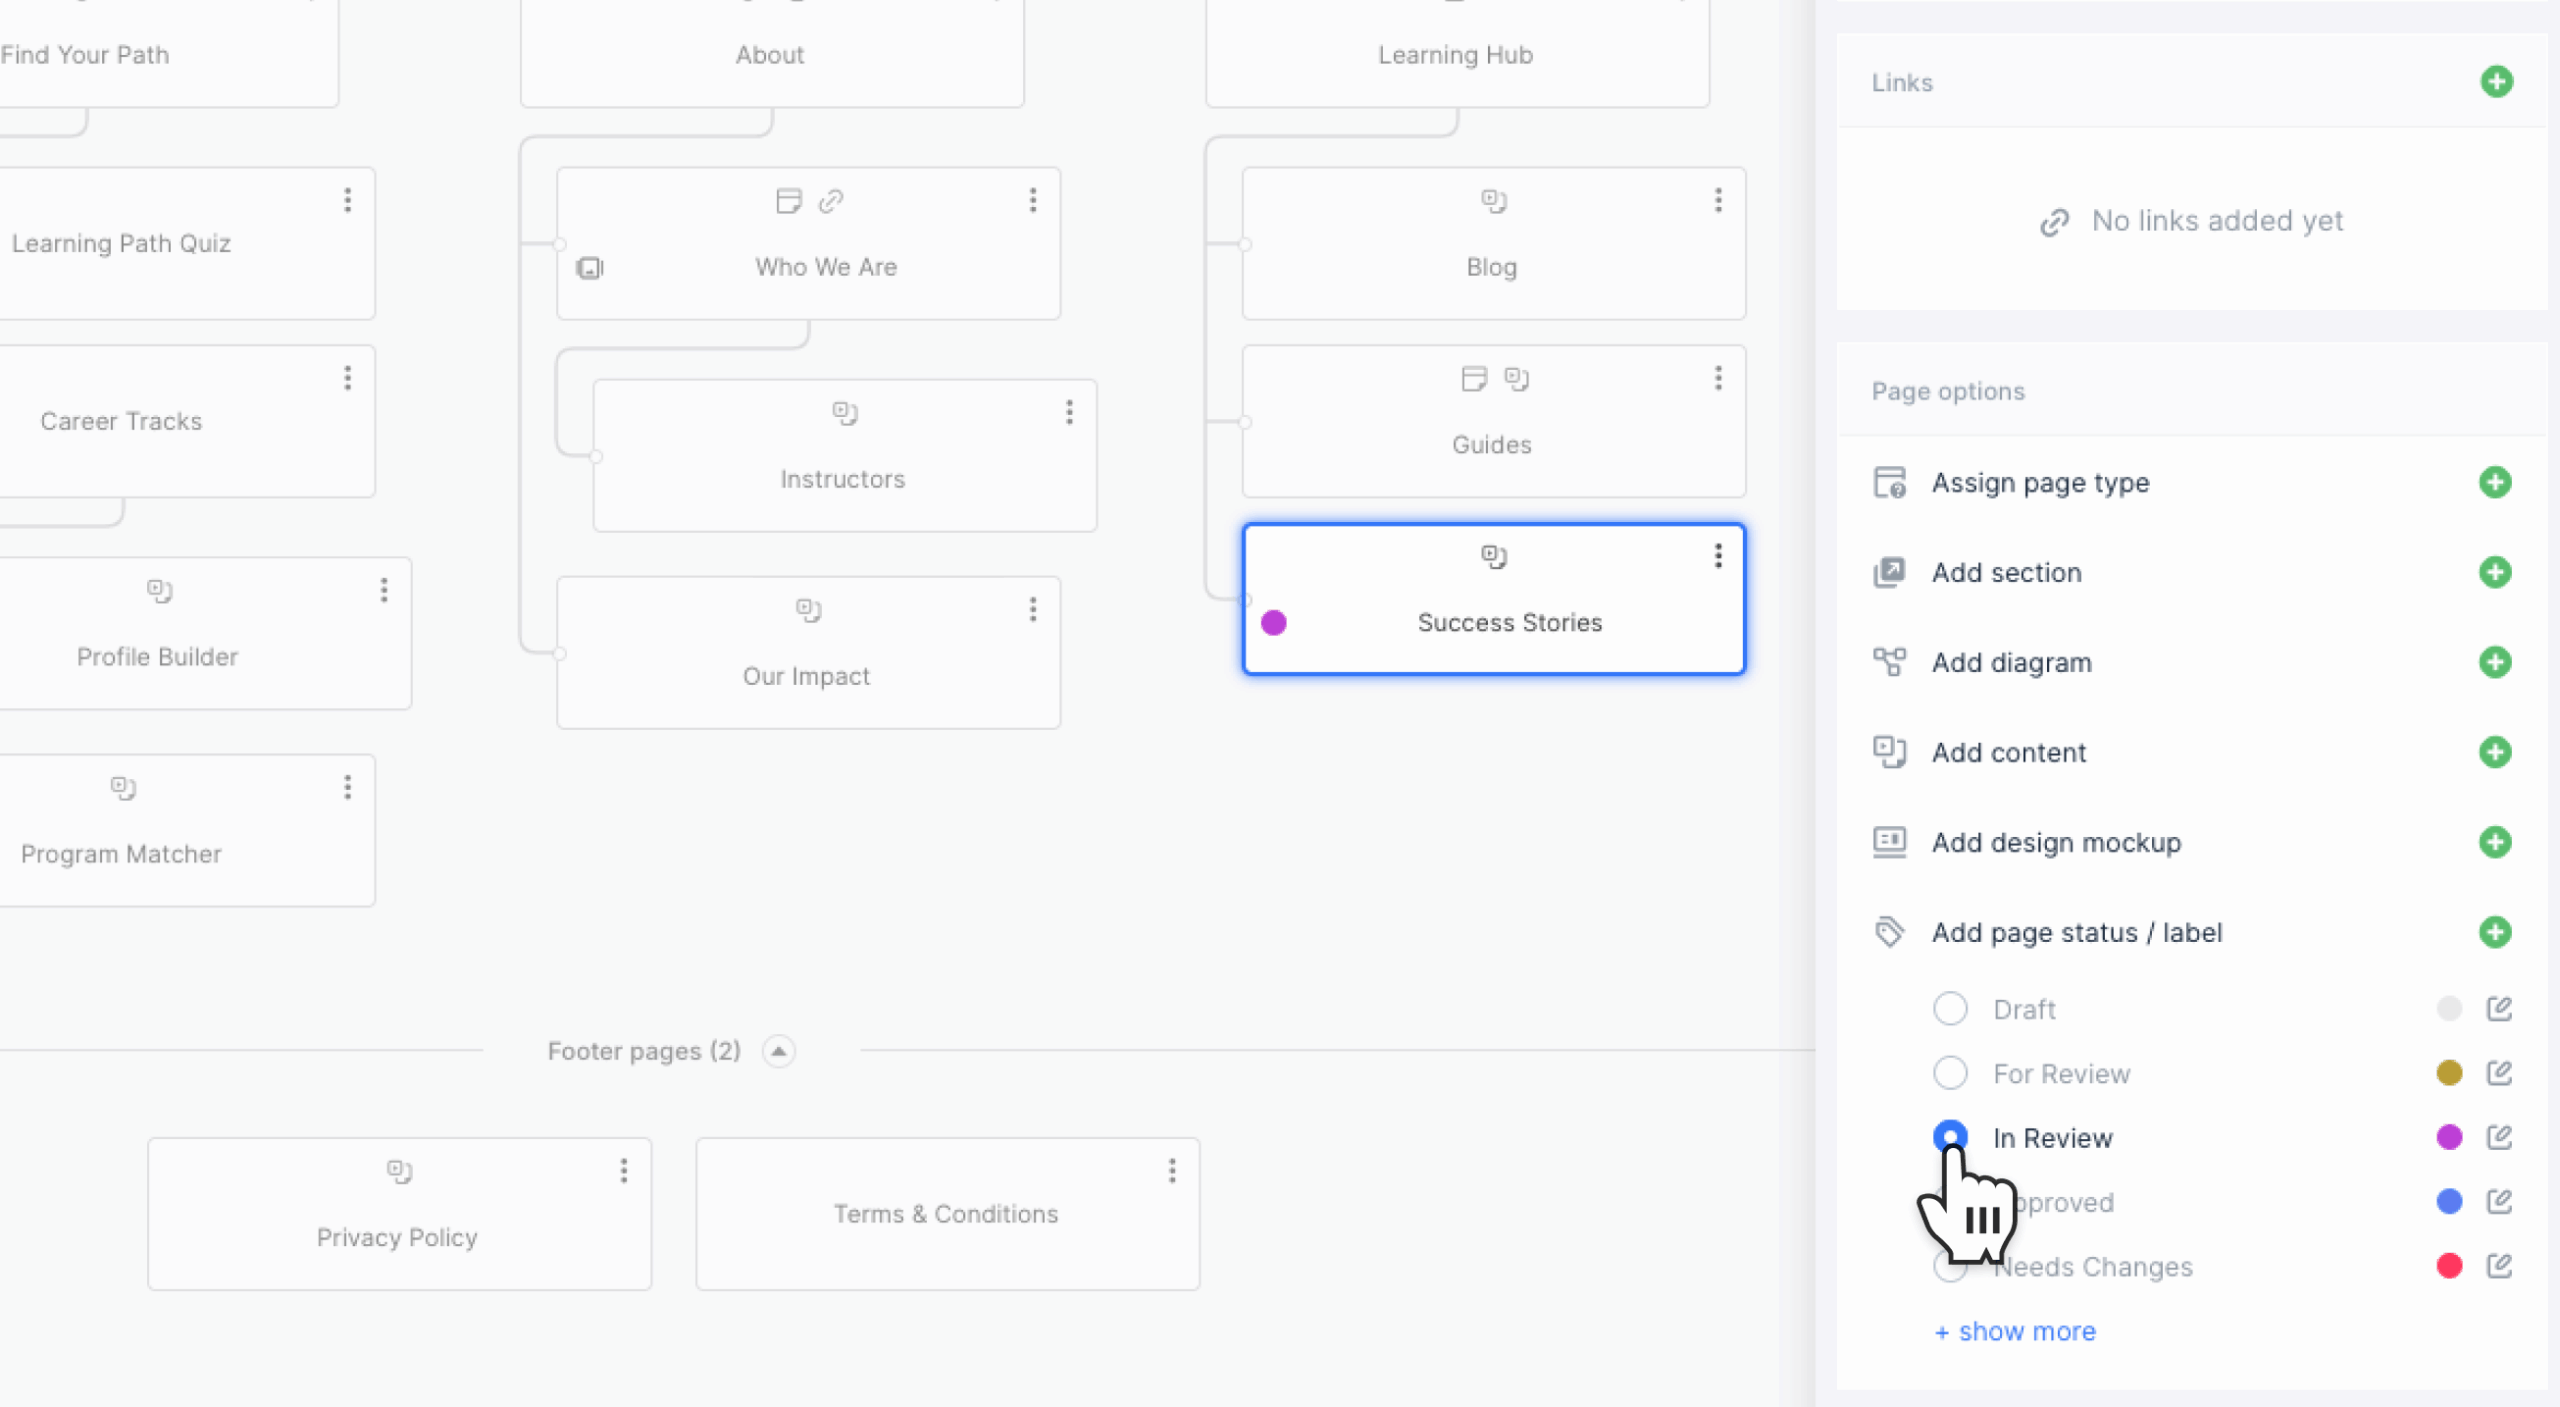
Change a page status from Sitemap Builder
- Open Sitemaps.
- Open the page’s More menu using the three-dot icon to display the Page Properties panel.
- In the Page Properties panel, find Add Page Status / Label.
- Select the status you want to assign.
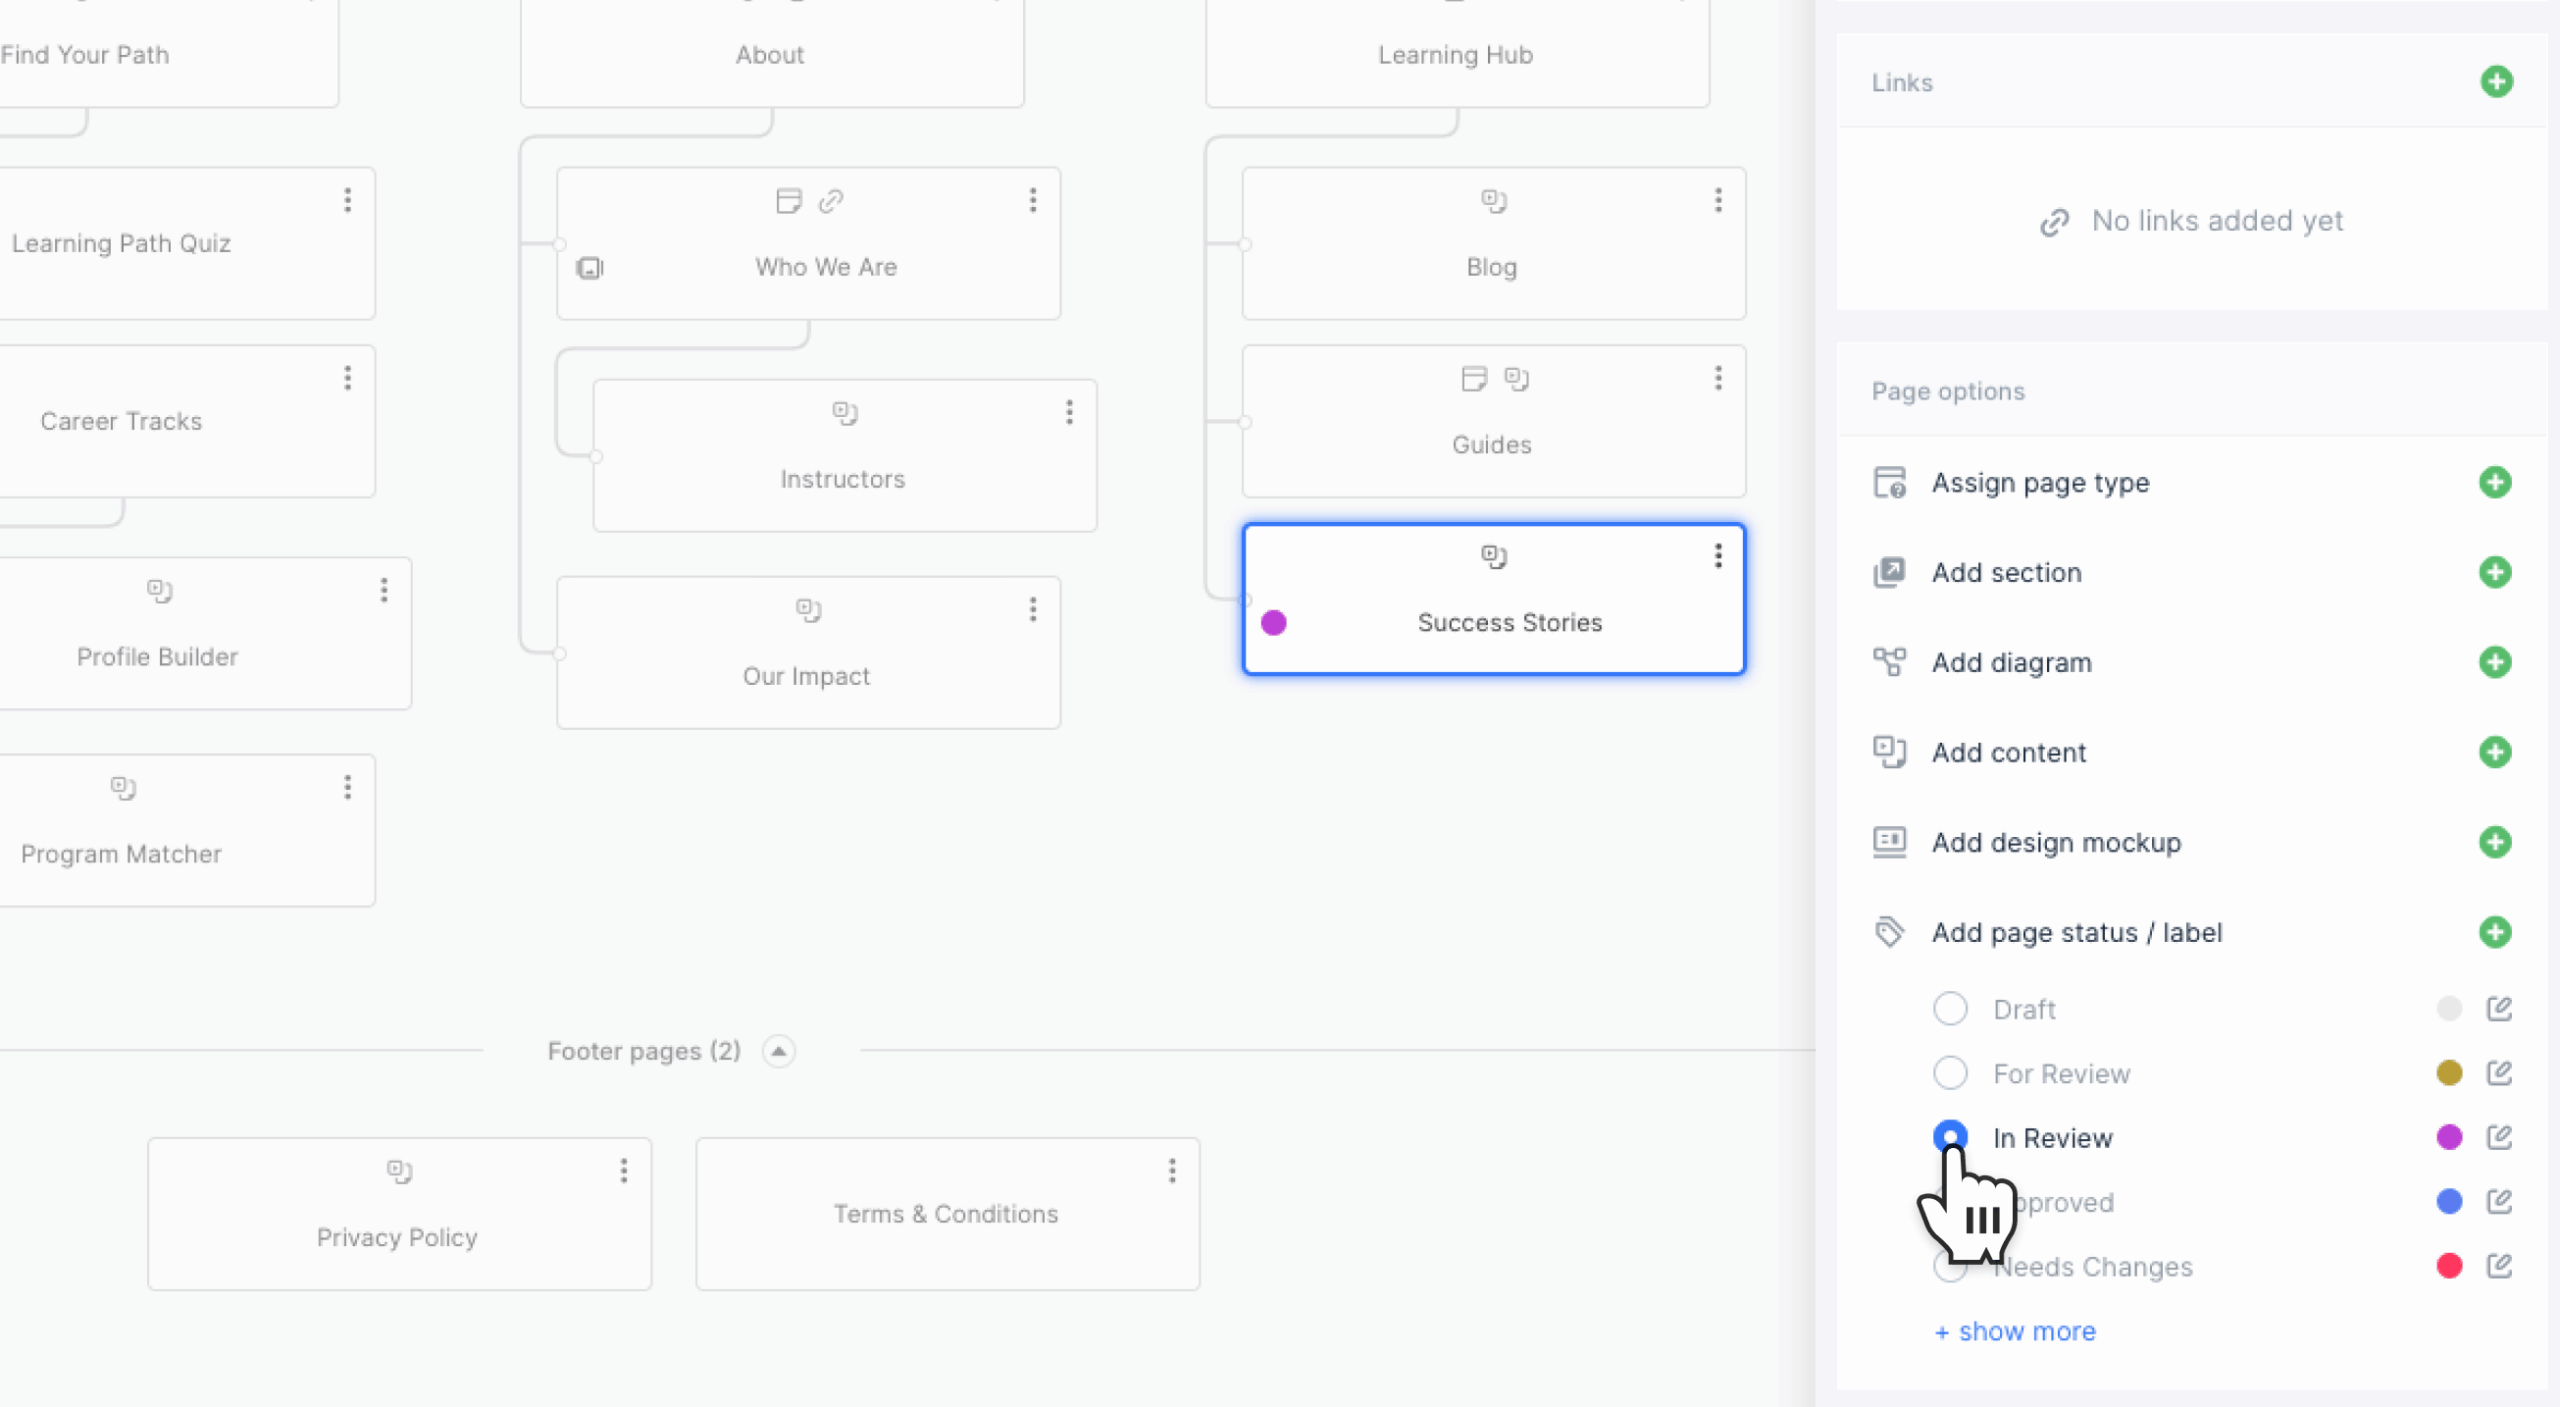
The status applies immediately and is reflected in Content Overview. A page with an assigned status displays a corresponding colored dot in the sitemap. Move the pointer over the dot to display a tooltip such as Status: Approved.
Change the status of a read-only page
A status configured with Lock page editing (read-only) prevents changes to content blocks in Page Editor. The blocks and editing controls remain unavailable until the page is moved to a status without the read-only attribute.
An Owner, Admin or Project Manager can change the page to another status. A Contributor or Writer assigned to the page can also change its status. Commentators cannot change page statuses.
For instructions on creating, importing, organizing or configuring read-only statuses, see Creating and managing Content Planner statuses.