Enabling two-factor authentication
Before enabling the two-factor authentication for your Slickplan account, you will need an authorization app such as Google Authenticator or Authy.
We recommend Authy as it enables an encrypted backup of the private key in the cloud. This means you can easily recover your account if you lose or reset your phone. It also makes it easier to use Authy on multiple devices.
Tip: A major problem with Google Authenticator is that if you lose your phone, you will lose access to your two-factor authentication account unless you save your private key in advance. Without it, you won’t be able to recover your account details and will need help from our support team.
To enable the 2FA for your Slickplan account:
- From the dashboard, click on My Profile.

- Under the password field, toggle the Two Factor-Authentication switch to on.

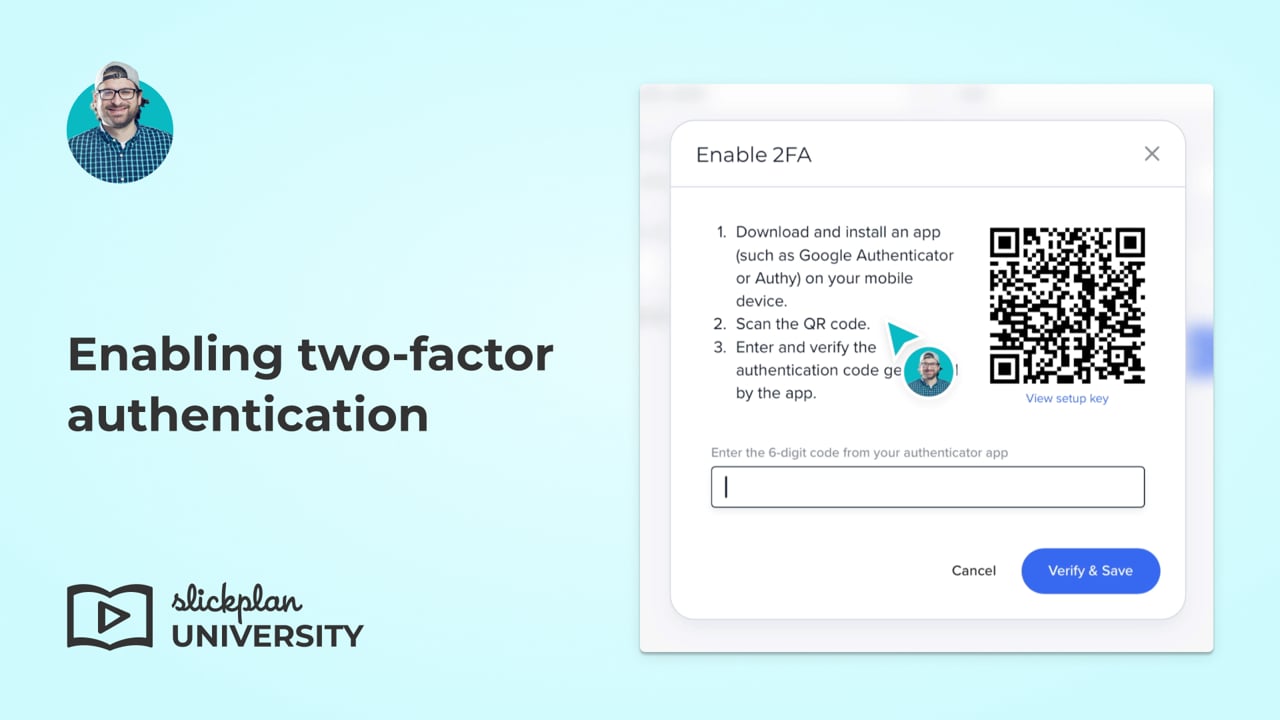
- A modal window with a QR code will open.

- Open your authentication app (Authy for this example) and tap on New Account.

- Scan the QR code from the Two-Factor Authentication modal with your phone’s camera or enter the setup key manually into the authentication app.
This links your Authy app to Slickplan, allowing it to generate unique one-time codes for secure logins.


- Once Slickplan is added, the authentication app will display a 6-digit code. Enter the code into the modal window. Click Verify & Save.

- Save changes to finish.
