How to use the Slickplan’s WordPress plugin
Slickplan’s WP plugin migrates your projects into the WordPress CMS automatically, speeding up your development process and eliminating tedious and time-consuming grunt work.
Quickly import sitemaps as menus, page content, and media files with only a few clicks. Our customizable plugin works with new websites and existing ones that need a few updates. Either way, you’re in control.
In this guide, we’ll explain how to install, import and tailor everything to your specific project.
To get started, follow these steps:
Install the Slickplan plugin
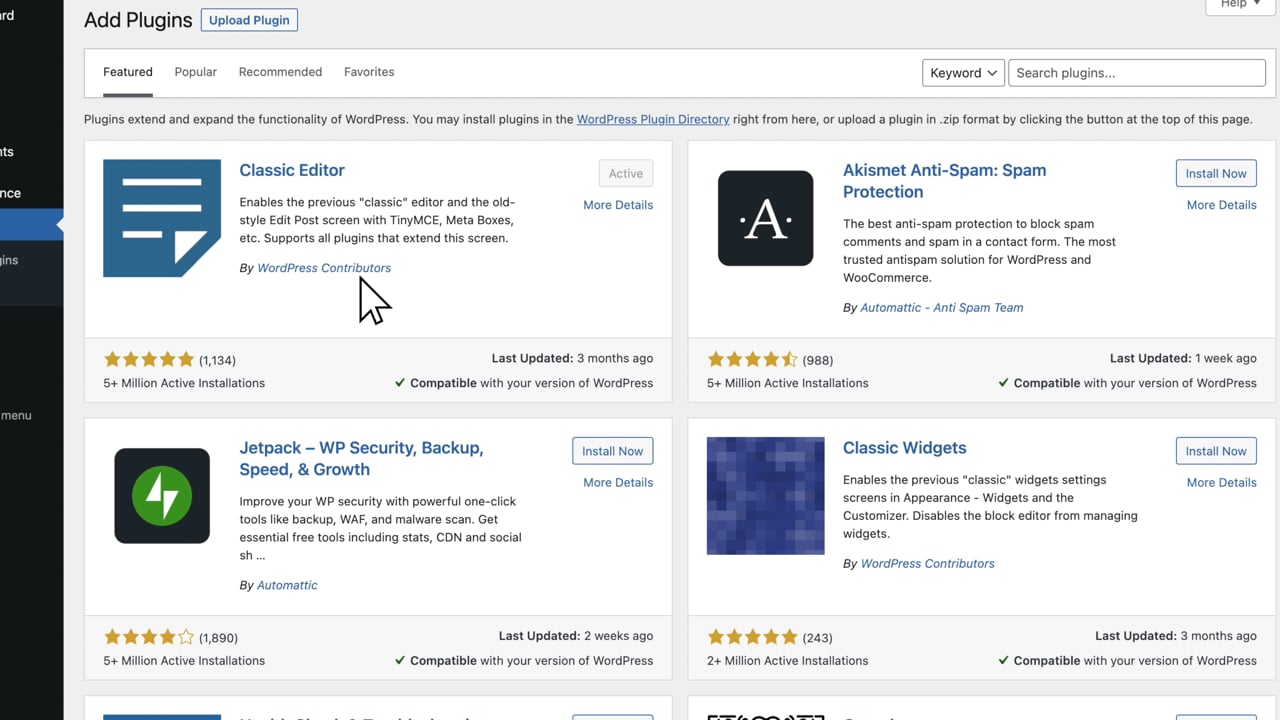
- Log into your WordPress account. Navigate to the Plugins section and click Add New.
- In the search bar, type Slickplan and locate the Slickplan plugin.
- Click Install Now to begin the installation process.
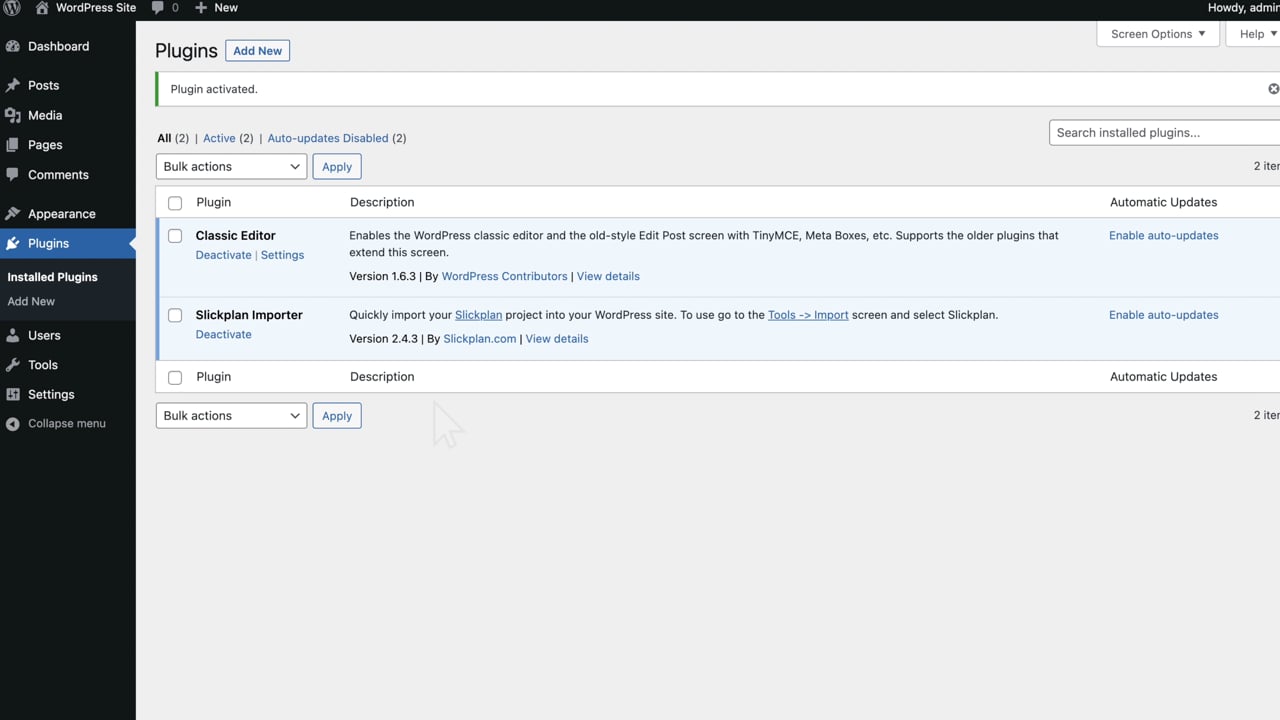
- Once the installation is complete, click Activate Now to activate the Slickplan Importer.
Tip: If there is an available plugin update, click Update Now to ensure you have the latest version.
Import a sitemap file
Make sure you’ve exported your project as Slickplan XML and have the file ready, then:
- Go to Tools and select Import.
- From the importer list, choose Slickplan and click Run Importer.
- Click Select File to locate the SlickplanXML sitemap file you want to import from your hard drive.
- Confirm by choosing Upload File and Import.
Customize the import
Once the Slickplan XML file has been imported, you can adjust additional settings to customize your content import.
By default, content will be imported as WordPress Pageswith the same hierarchical structure as your Slickplan project. If you wish to import it differently, such as posts or a mix of pages and posts, follow the directions below.
- Select the Import as menu under the Options section and choose one:
- Pages – imports sitemap structure as pages only
- Posts (non-hierarchical) – imports sitemap pages as posts without hierarchy enabled.
- Select per page (next step) – Selecting this option takes you to an additional page to customize your content import in more detail. This includes options: overwrite existing pages, exclude pages from import, specify between page & post types for individual pages
- Check Update my site title if you’d like to overwrite the WordPress title in your general settings with the name of the Slickplan project you’re importing.
- Check Create menu from imported pages and give the menu a name to create a WordPress menu if you’ve selected to import as Pages. Posts and Select per page options will not see this option.

Format page titles
Slickplan page names are used as the page and post titles. Select how you’d like them formatted in WordPress by choosing one of these three options
- No change (import exactly as seen on Slickplan)
- Capitalize the first character of first word (This is an example page title)
- Capitalize the first character of each word (This Is An Example Page Title)

Select a content setting
Choose how you’d like content to import into the body of each page or post from the following options:
- Importing page contents from Content Planner
- If your Slickplan project includes multiple languages choose which one you’d like to import from the Language select menu.
- If you’d like to import files (e.g. images, videos, PDFs) in your Slickplan project into the WordPress Media section check the box labeled Import files to Media Library
- Importing page notes as content
- Do not import any content

Click Import Pages to continue.
Note: If you selected to import as Posts (non-hierarchical) or Pages click on the Import Pages button below to finish. Otherwise, if you selected to customize your import with the Select per page option one final step explained below is required.
Advanced import options
The advanced import page lets you pick and choose which pages from your Slickplan XML file to import, and exactly how they’re imported. This is useful for an existing WordPress site that’s getting an update or redesign, or a site that may need just a few content updates from the Slickplan Content Planner to be up-to-date.
Select page(s) to modify
To select a single page to modify, select the checkbox to the left of the page name or click the link labeled Change when you hover over a row within the list of pages. To change multiple pages at once, select them by using the checkboxes on the left.

Once selected, from the top of the page two drop-down menus will appear from which you can make your selections.
- Choose whether the page is:
- New – New page to import
- Overwrite – Replaces an existing page
- Excluded – Ignore page from this import
- Choose a type to import
- Page – Default WordPress page
- Post – Default WordPress blog article
- Custom Post – Specific post type added to WordPress that uses custom code or plugins
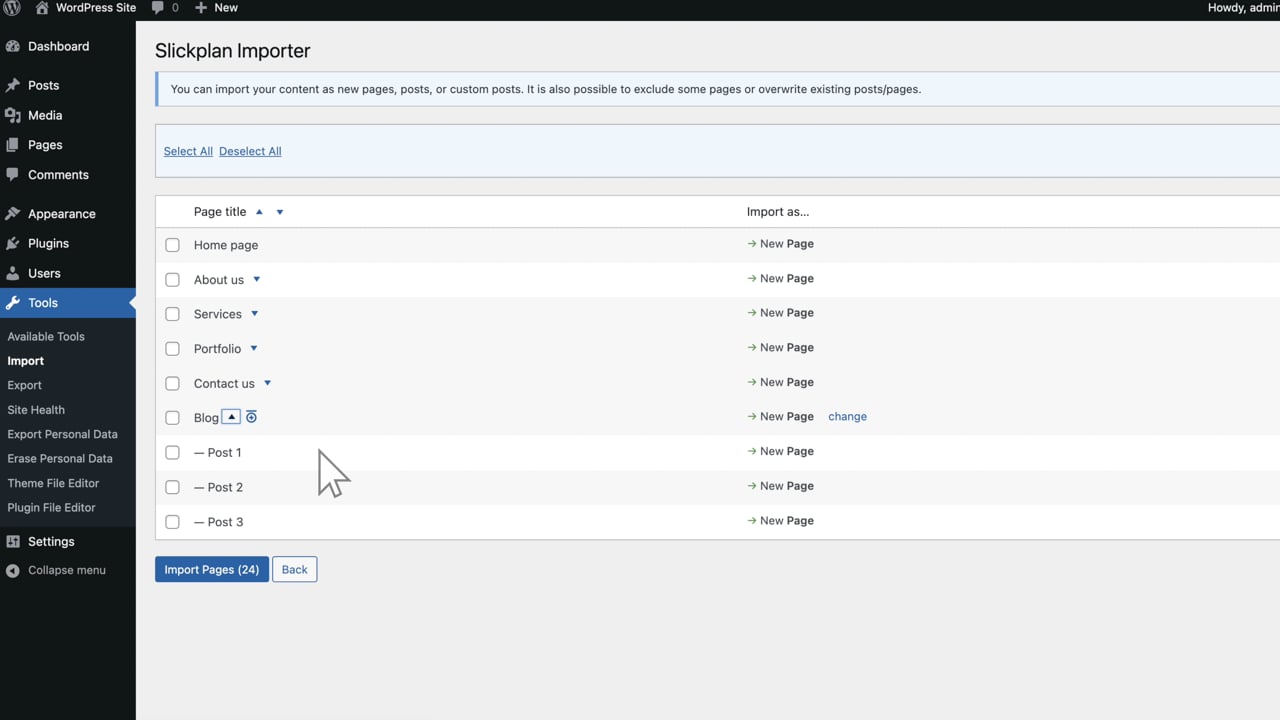
Tip: Click the arrows next to parent page names to expand their substructure and view all pages nested within them. Use the select all child pages button to easily apply a setting to them, for example:
If you have a Blog page with child pages as posts/articles, apply the Import as new page attribute to Blog, then select all child pages and apply the Import as new posts. This way the Blog will be imported as a page with child pages as posts.
Click the Import Pages button to initiate the import process.
Note: Once the import finishes, you will see a list of imported pages. Use the toolbar provided to browse through the imported pages, posts, and files.
The plugin supports Yoast SEO and All In One SEO plugins.
This plugin is also compatible with the Gutenberg page builder. It automatically imports your Slickplan’s Content Planner blocks into corresponding blocks in WordPress.