Building custom templates
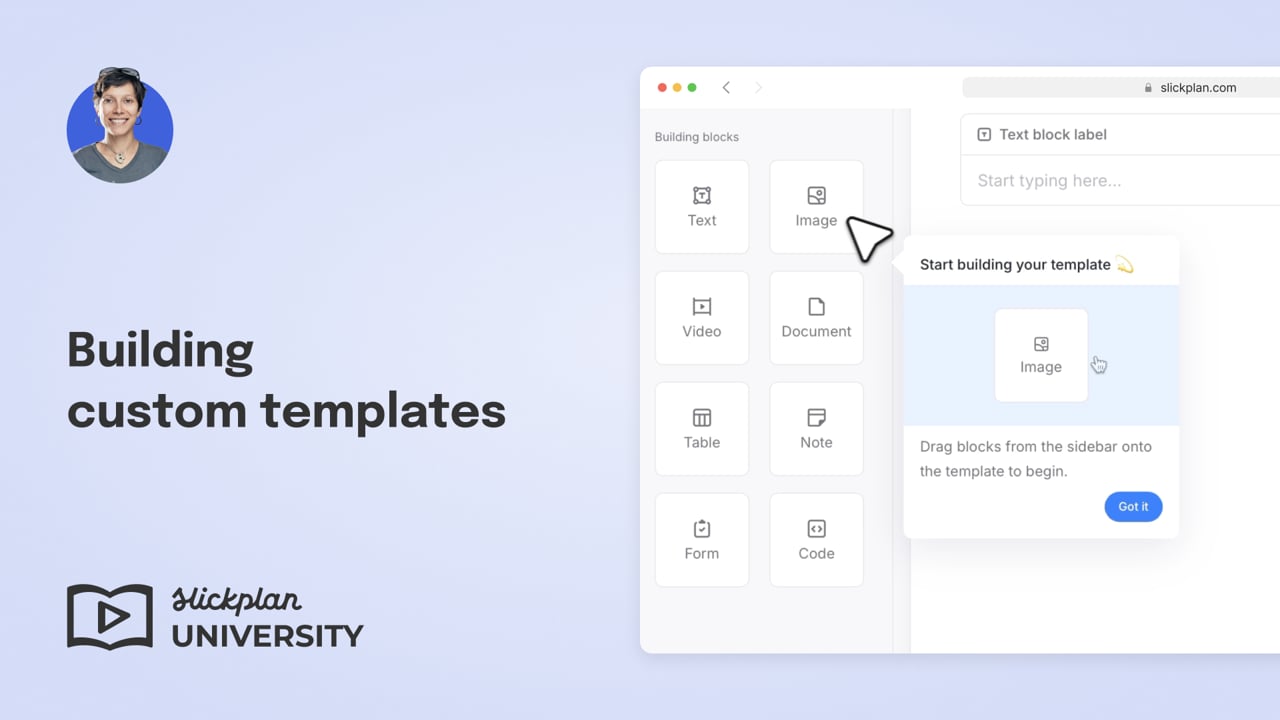
Templates let you create reusable structures for pages in the Content Planner. They’re especially useful when you want content creators to follow a consistent format with clear instructions for text, images, videos, and more.
This guide walks you through how to build a custom template step by step.
Creating a new template
- From the Content Planner, open the Templates tab.
- Click New template and enter a name (for example, “Help Desk Page”).
- The template editor will open. This interface looks similar to the Page Editor but without comments or suggestive editing.
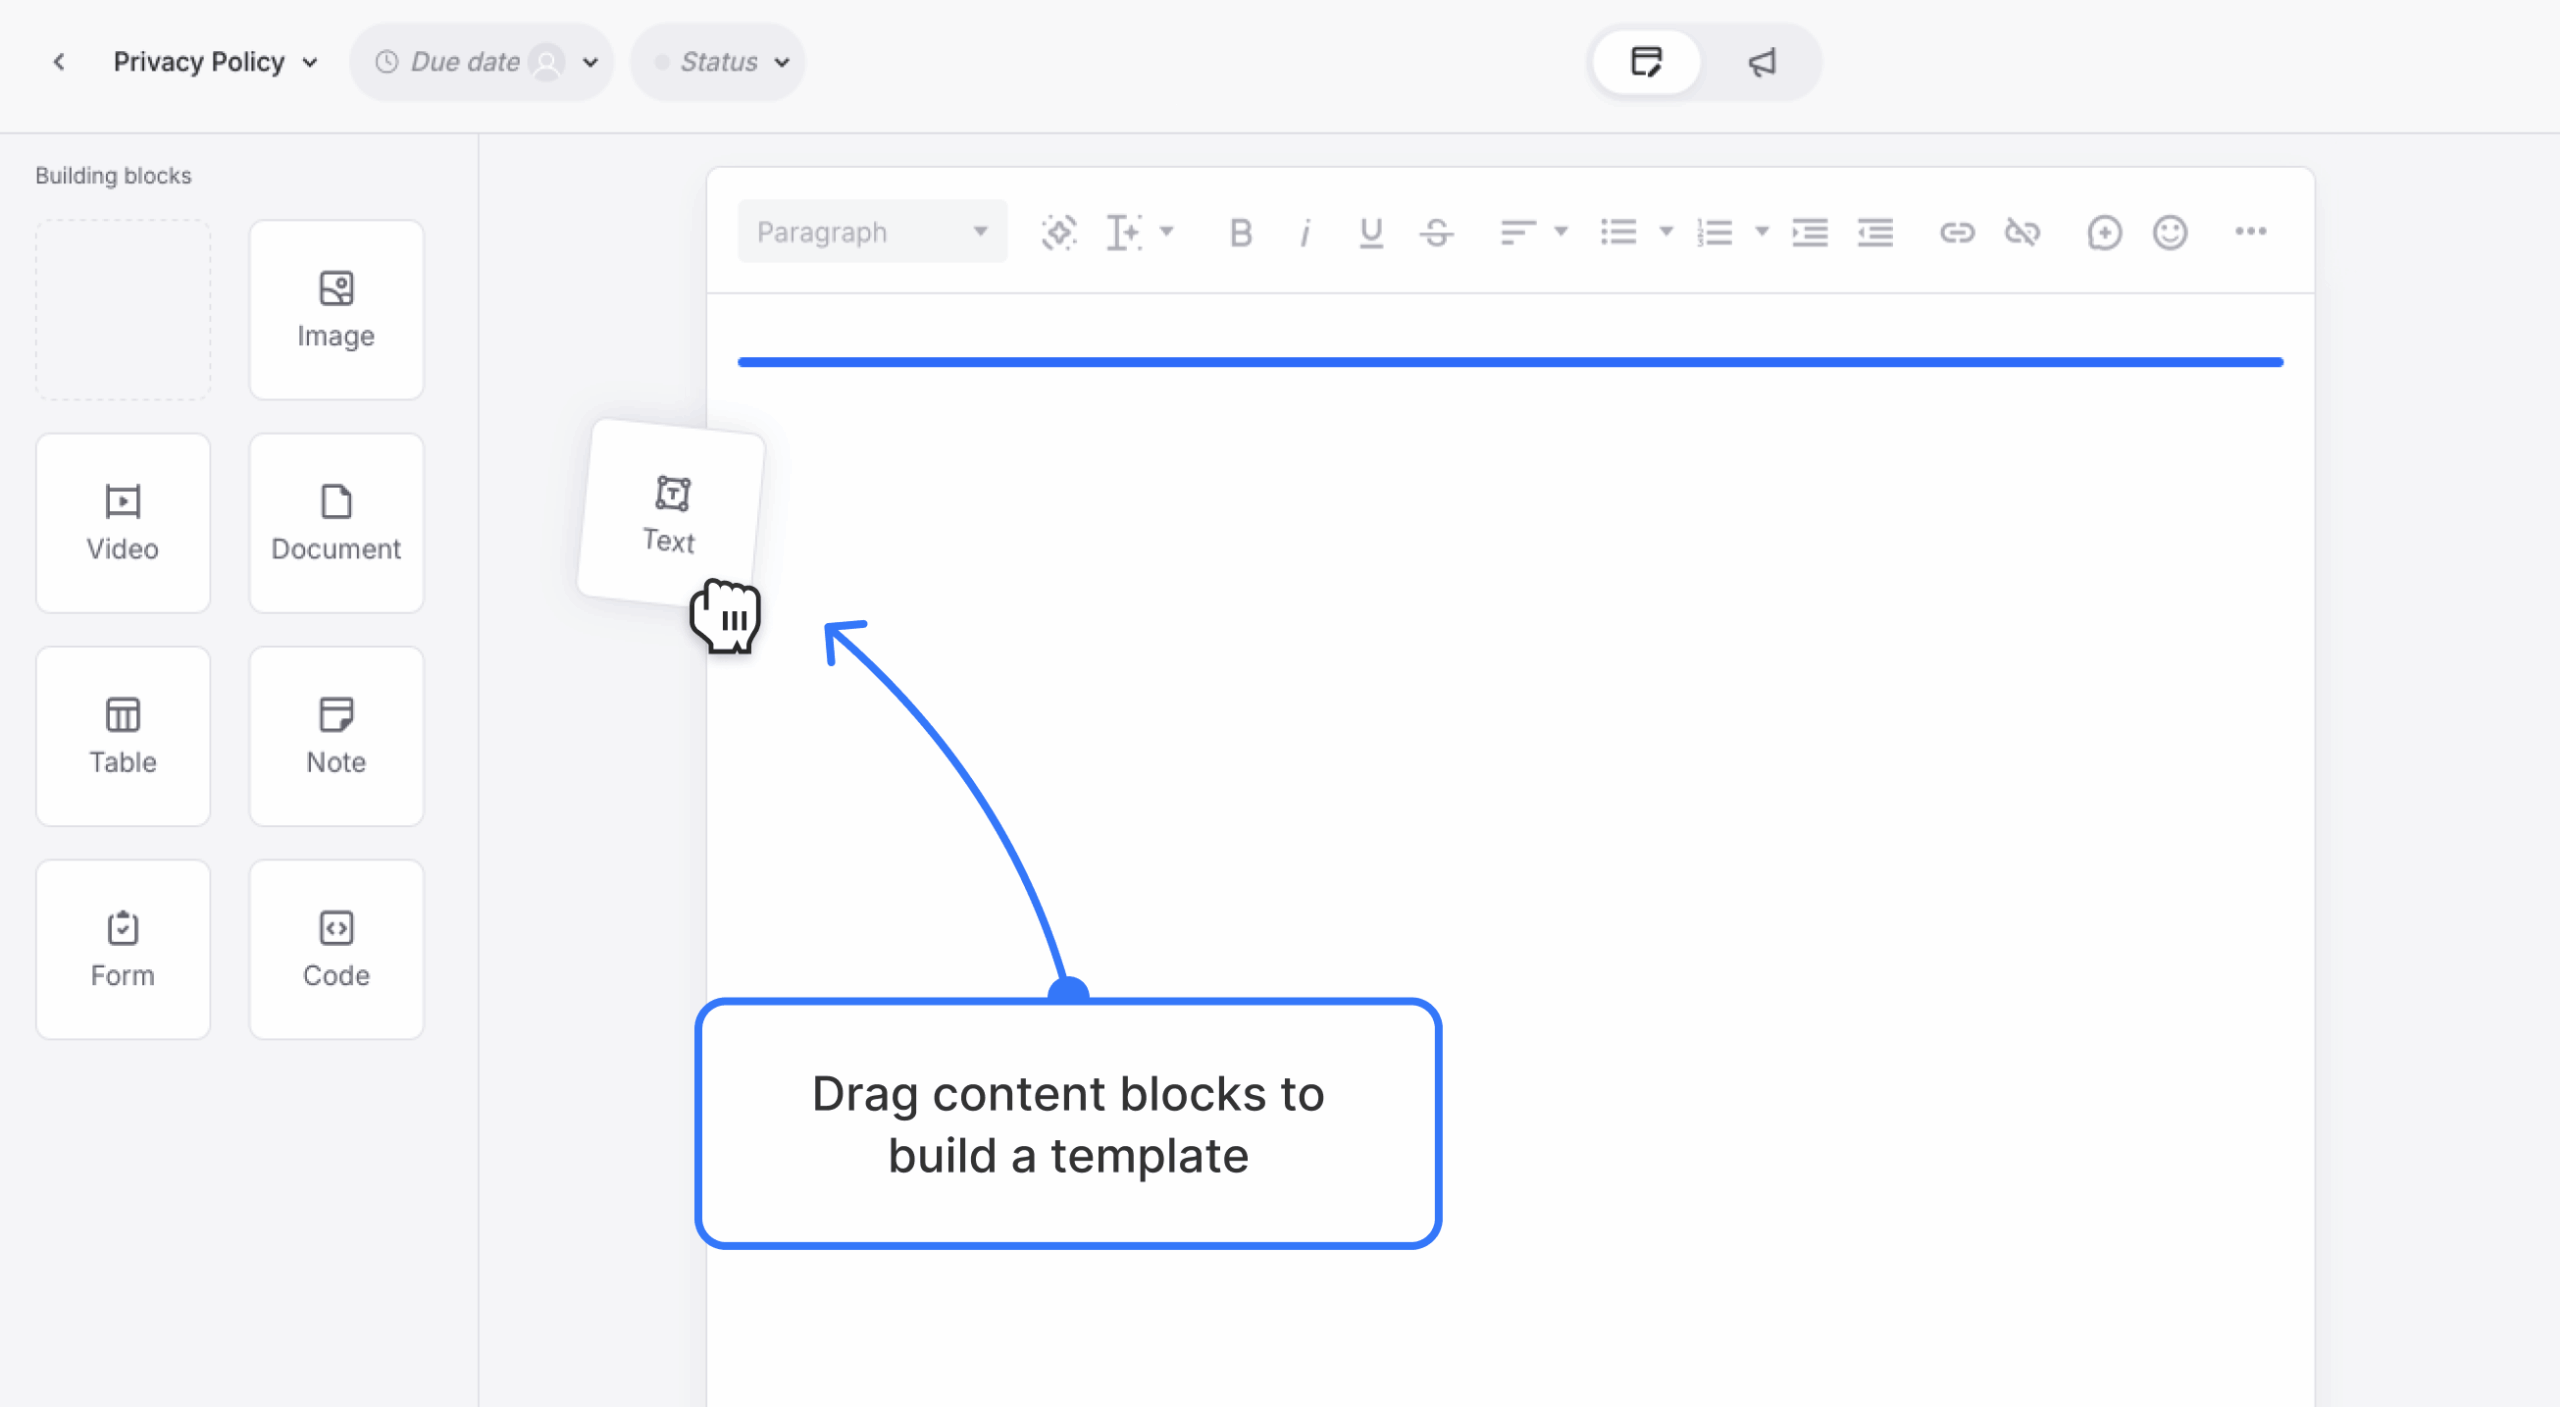
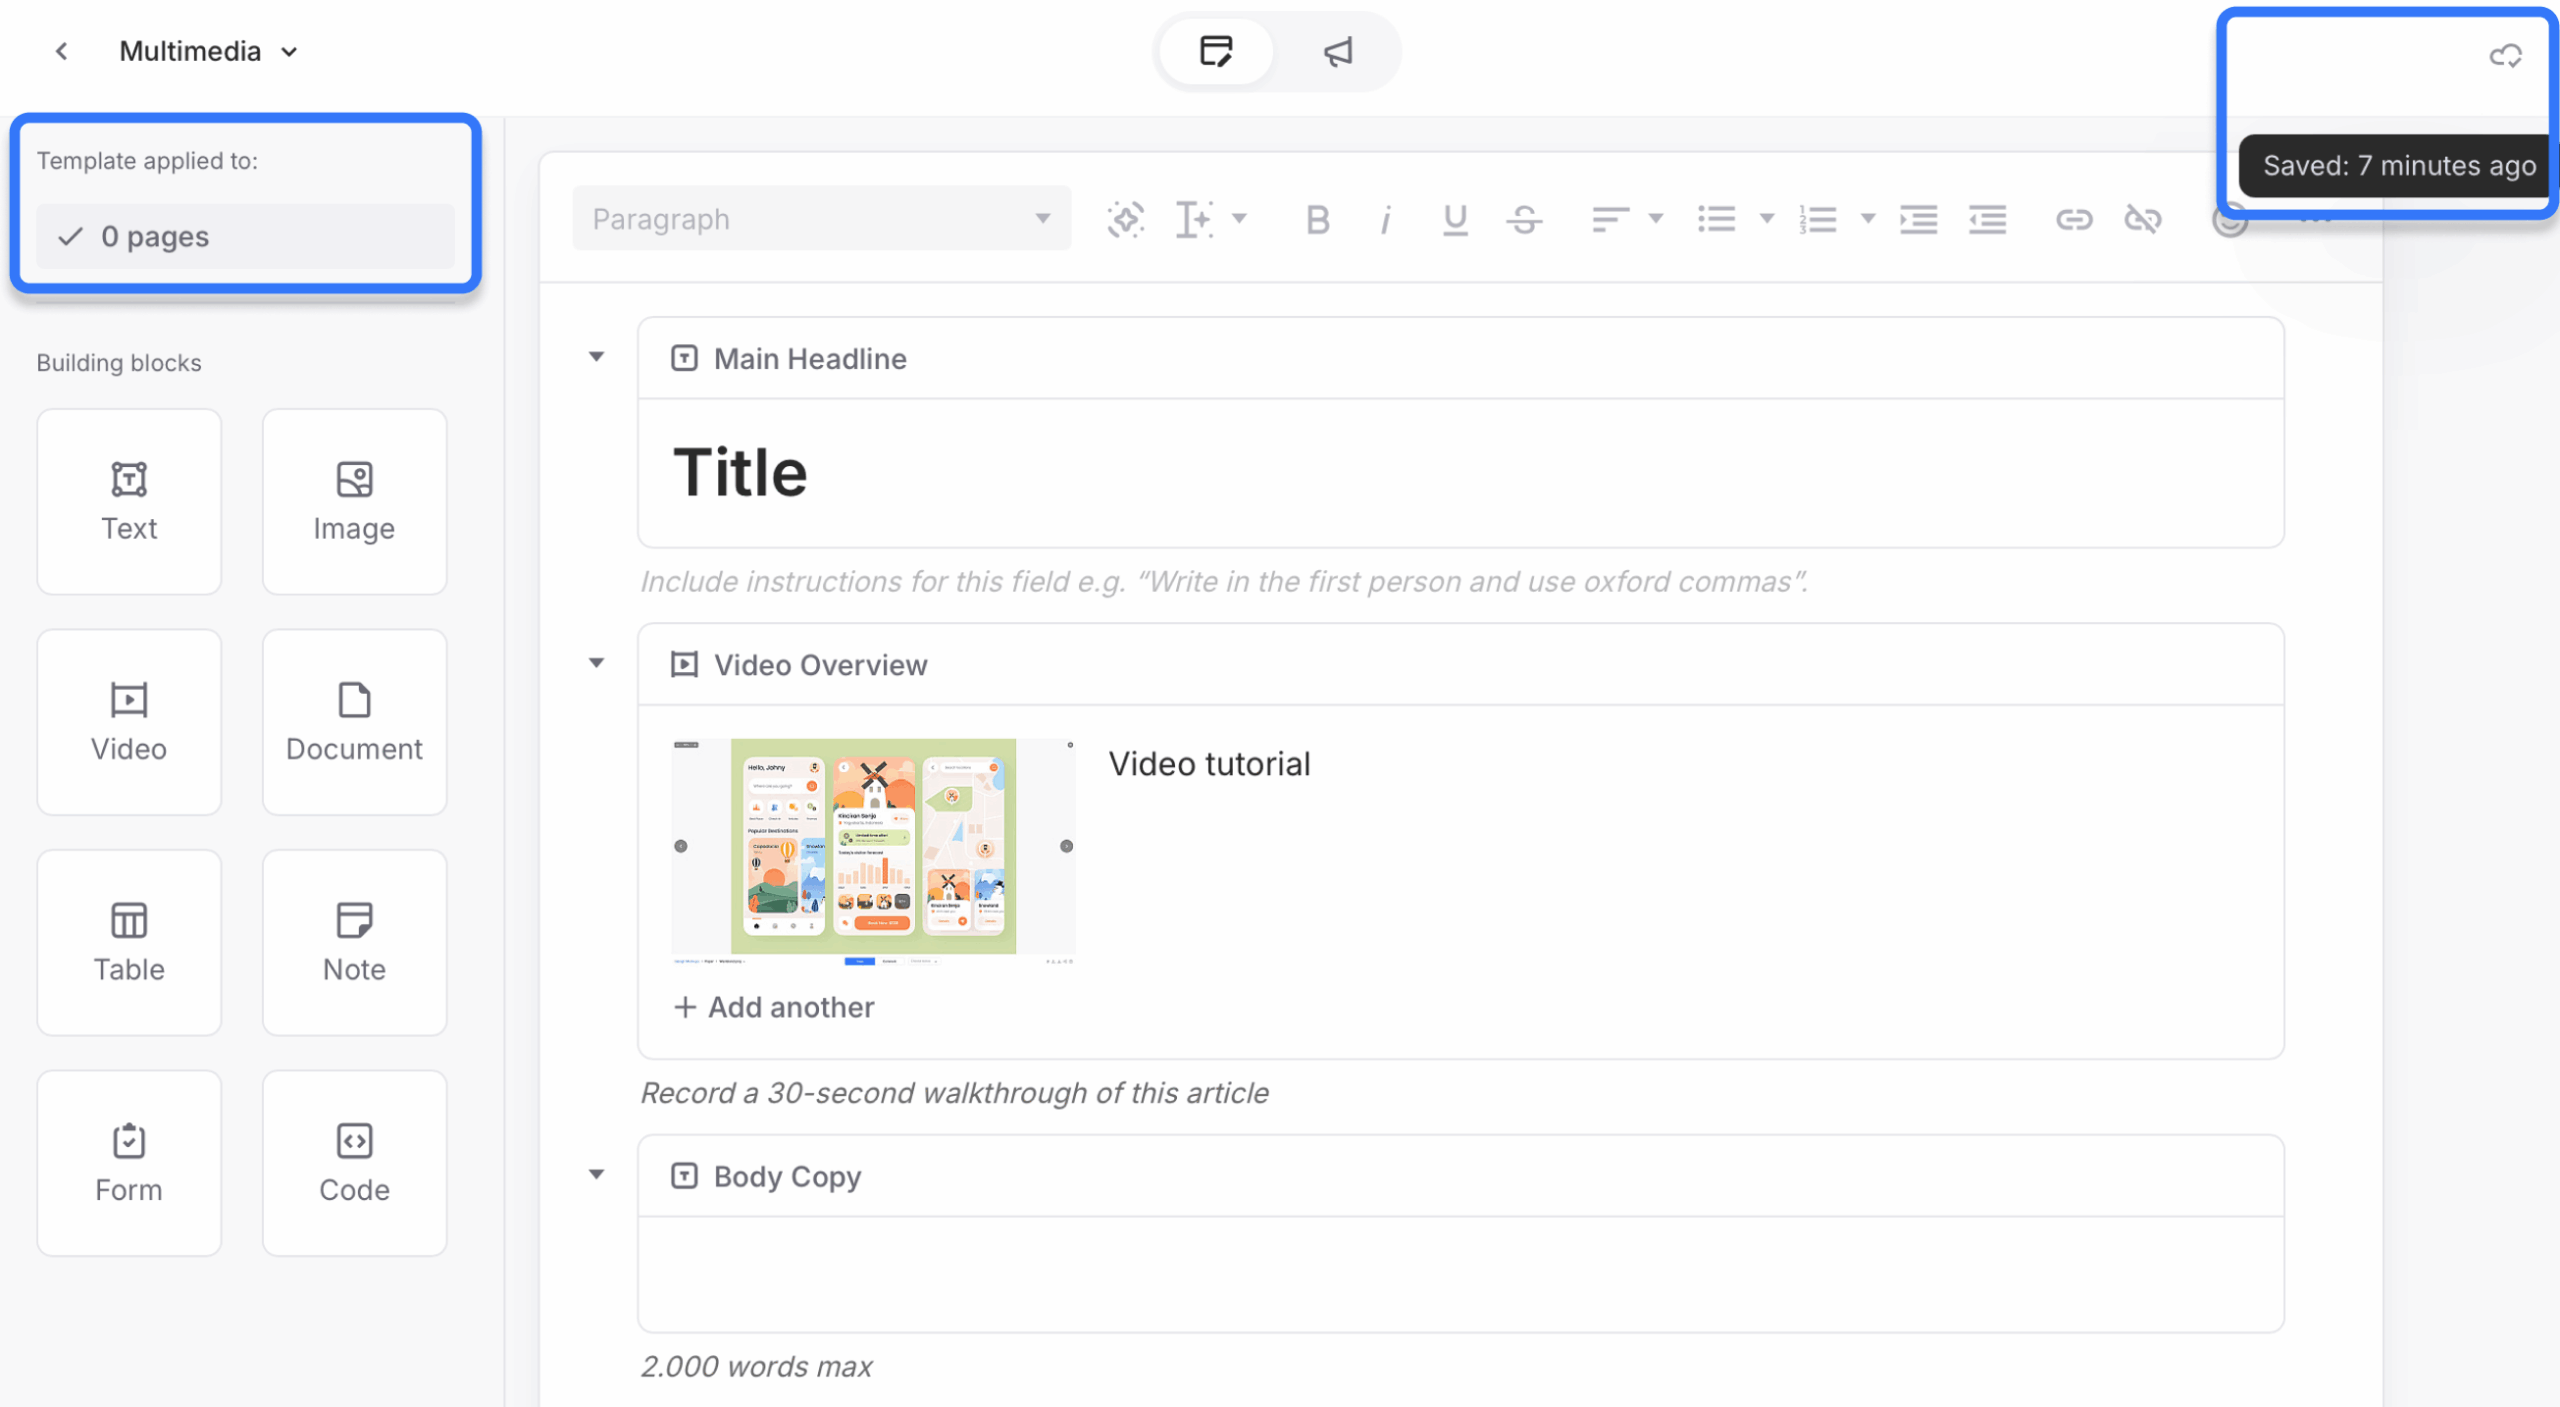
Adding content blocks
Drag building blocks from the left sidebar into the canvas to structure your template. Each block can be labeled and given instructions so writers know exactly what belongs there.
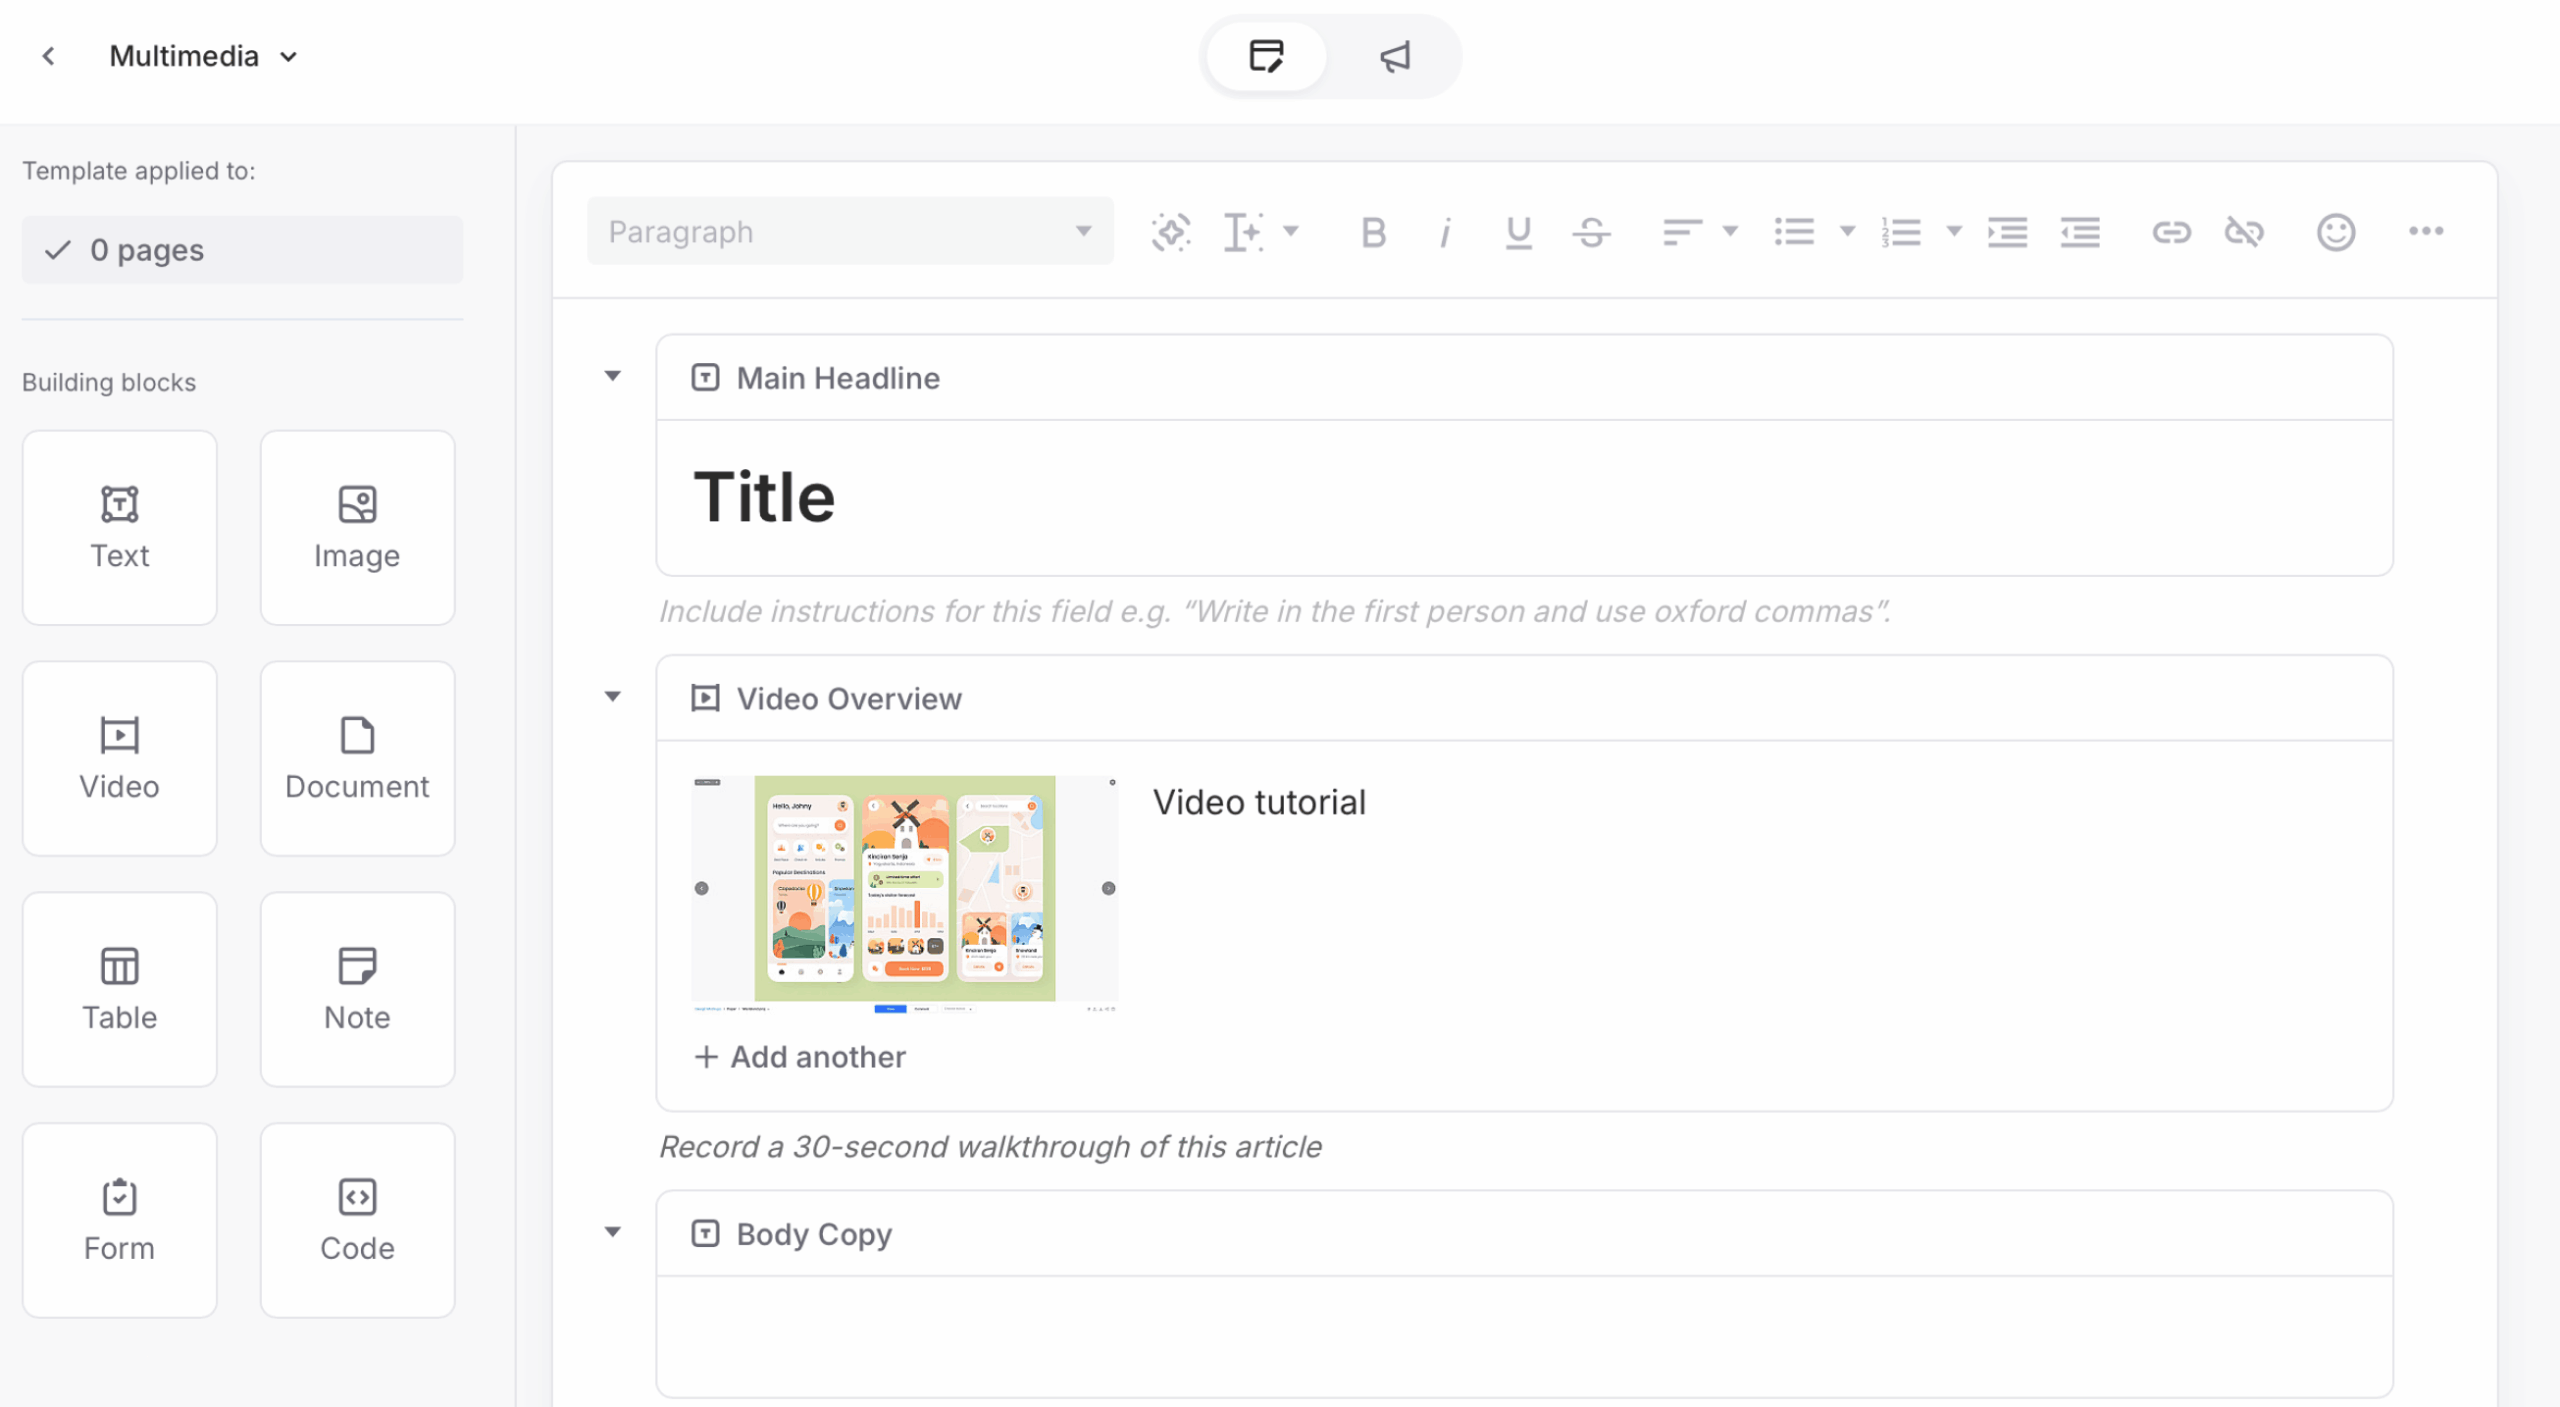
For example:
- Add a Text block → set type to Plain → enable HTML wrapper → choose H1. Label as Main Headline.
- Add a Video block → disable multiple uploads → limit to 1 video. Label as Video Overview and add custom instructions like “Record a 30-second walkthrough of this article.”
- Add a Rich Text block → label as Body Copy. Add instructions such as “Don’t exceed 2,000 words.”
Adding guidance and instructions
Each block includes a Label and Custom instructions field. Use these to clarify expectations:
- Define limits (e.g., word count or upload restrictions).
- Provide formatting guidance.
- Add sample content or placeholders if helpful.
You can also add Note blocks for additional instructions not tied to specific content.
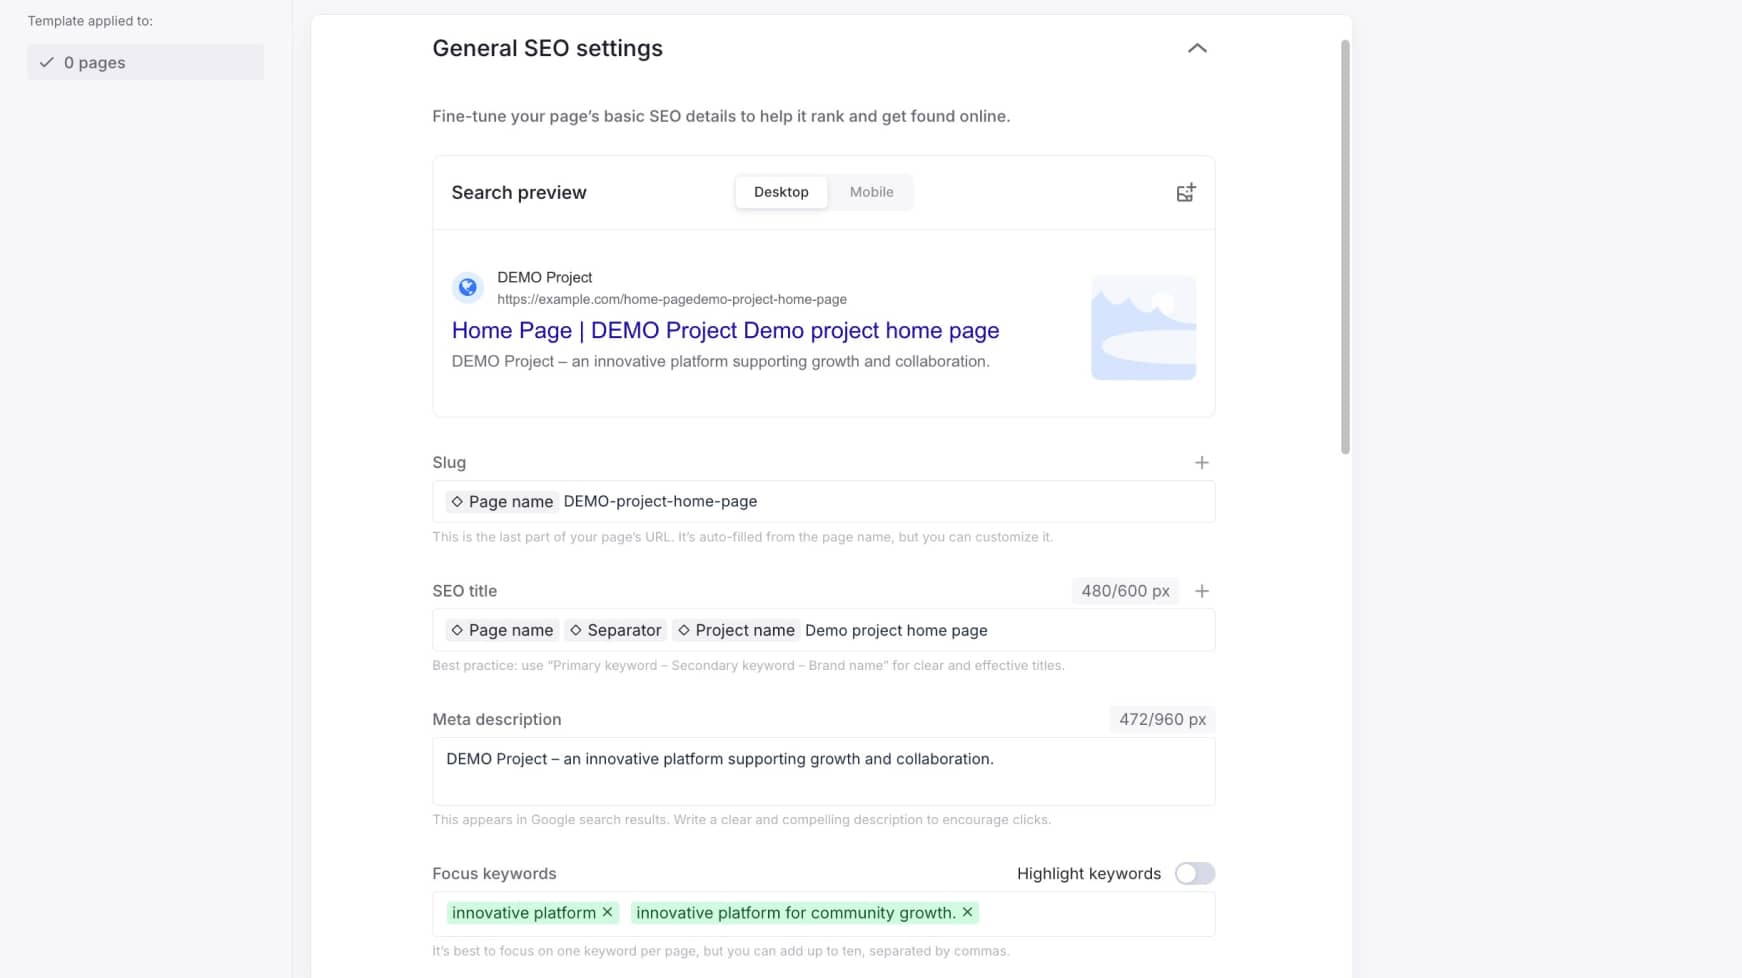
SEO settings in templates
Like the Page Editor, templates include an SEO settings panel. Use this to pre-fill variables (such as page name, project name, separators, or brand name) so writers don’t have to repeat these patterns each time.
Saving and tracking templates
All changes save automatically. Look for the cloud checkmark in the top-right corner to confirm your work is saved.
If the template has been assigned to pages, you’ll see a count at the top of the editor. Editing or deleting blocks may affect those pages, so proceed carefully.
Template editor showing save checkmark and template applied to 0 pages.
That’s it! You now have a custom template that can be reused across your projects to standardize structure and guide content creators.