Get started with Content Planner
Content Planner helps you create page content and organize the work around it. Use this quick start to open Content Planner, add content to a page and choose the page details that support your workflow.
Before you begin
Content Planner is available during the 14-day free trial and on Pro, Team and Agency plans.
The actions available to you depend on your project role and page assignments. For details, see User roles and permissions in Slickplan.
Open Content Planner
- Open your project and go to the Sitemap.
- Select Content in the top navigation bar.
Content Planner opens in Content Overview, with Overview selected.
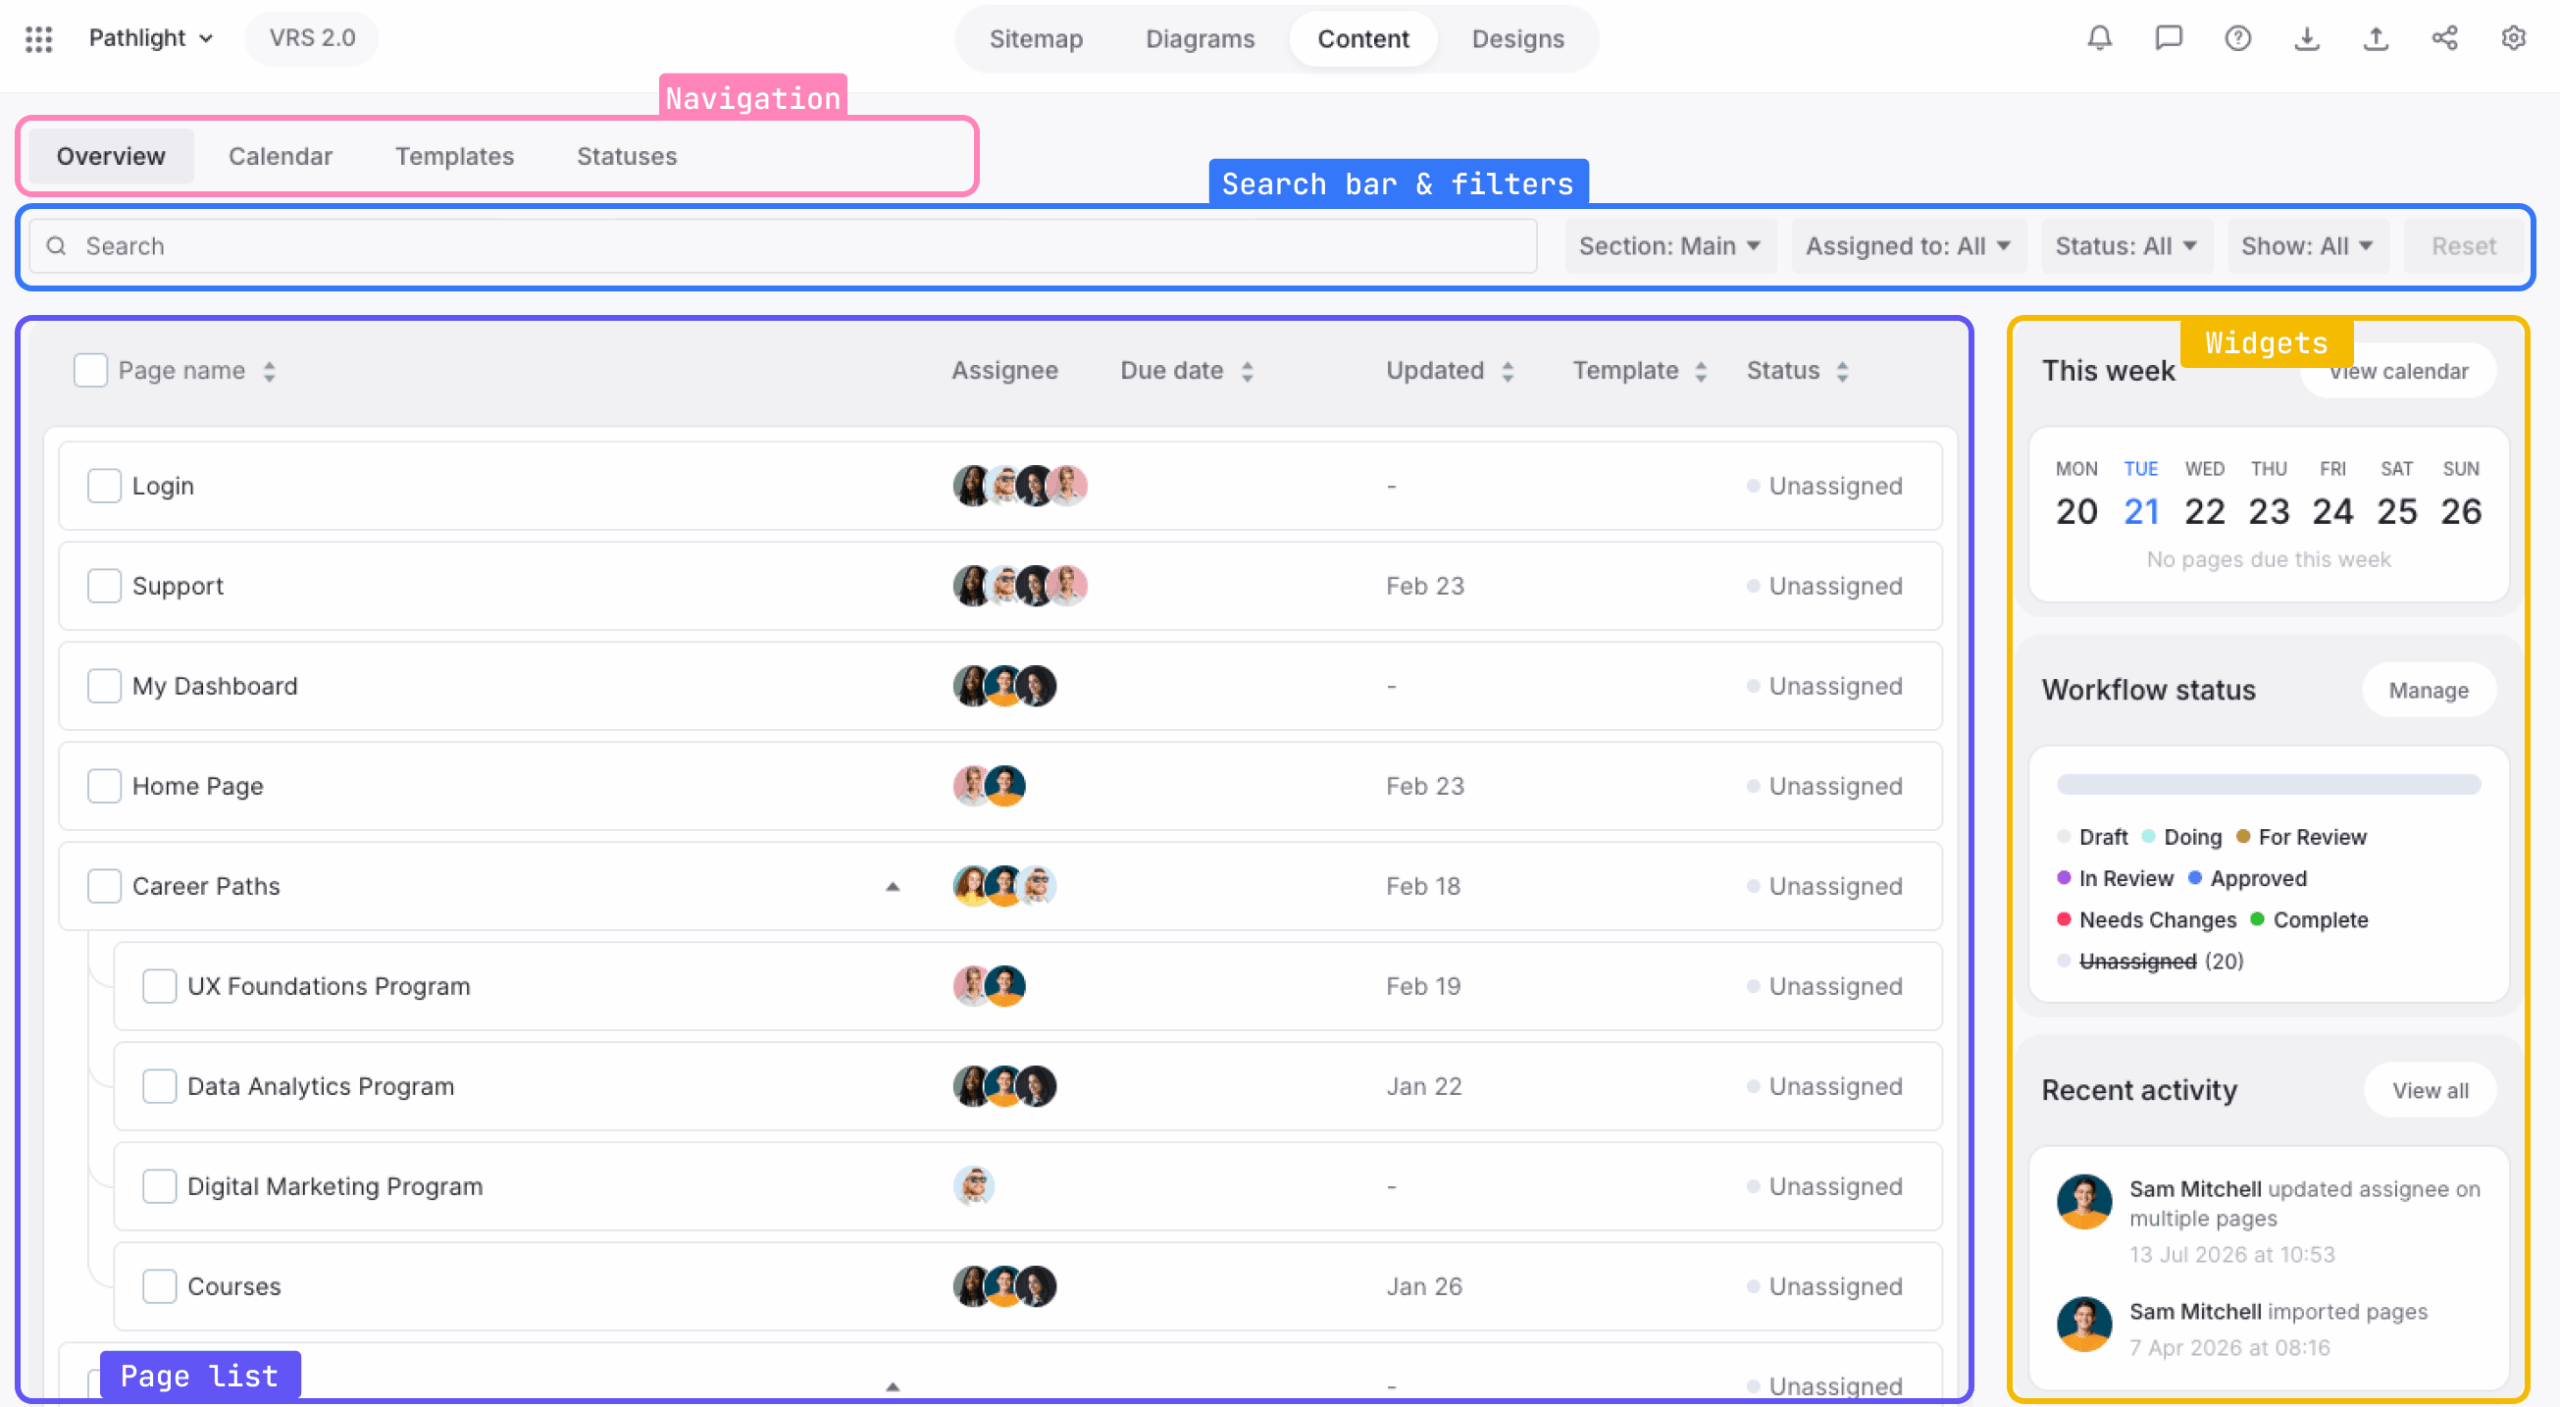
Understand Content Overview
Content Overview lists your sitemap pages in a table. Select a page name when you want to create or edit its content.
The page table can include these columns:
- Assignee shows who is responsible for the page.
- Due Date shows when the page is due.
- Updated shows when the page was last edited. This value is informational.
- Template shows the content template applied to the page.
- Status shows the page’s workflow status.
There is no required order for setting these details. Use the options that match your project workflow. For example, assign pages when several people are working on the project, add due dates when work must follow a schedule and use statuses to monitor progress.
The other Content Planner tabs are:
- Calendar for reviewing pages by due date
- Templates for managing reusable content structures
- Statuses for managing page workflow statuses
Add content to a page
- Select a page name in Content Overview.
- In Page Editor, choose the content block that matches what you want to add.
- Add the content to the block.
Available content blocks include Text, Image, Video, Document, Table, Note, Form and Code.
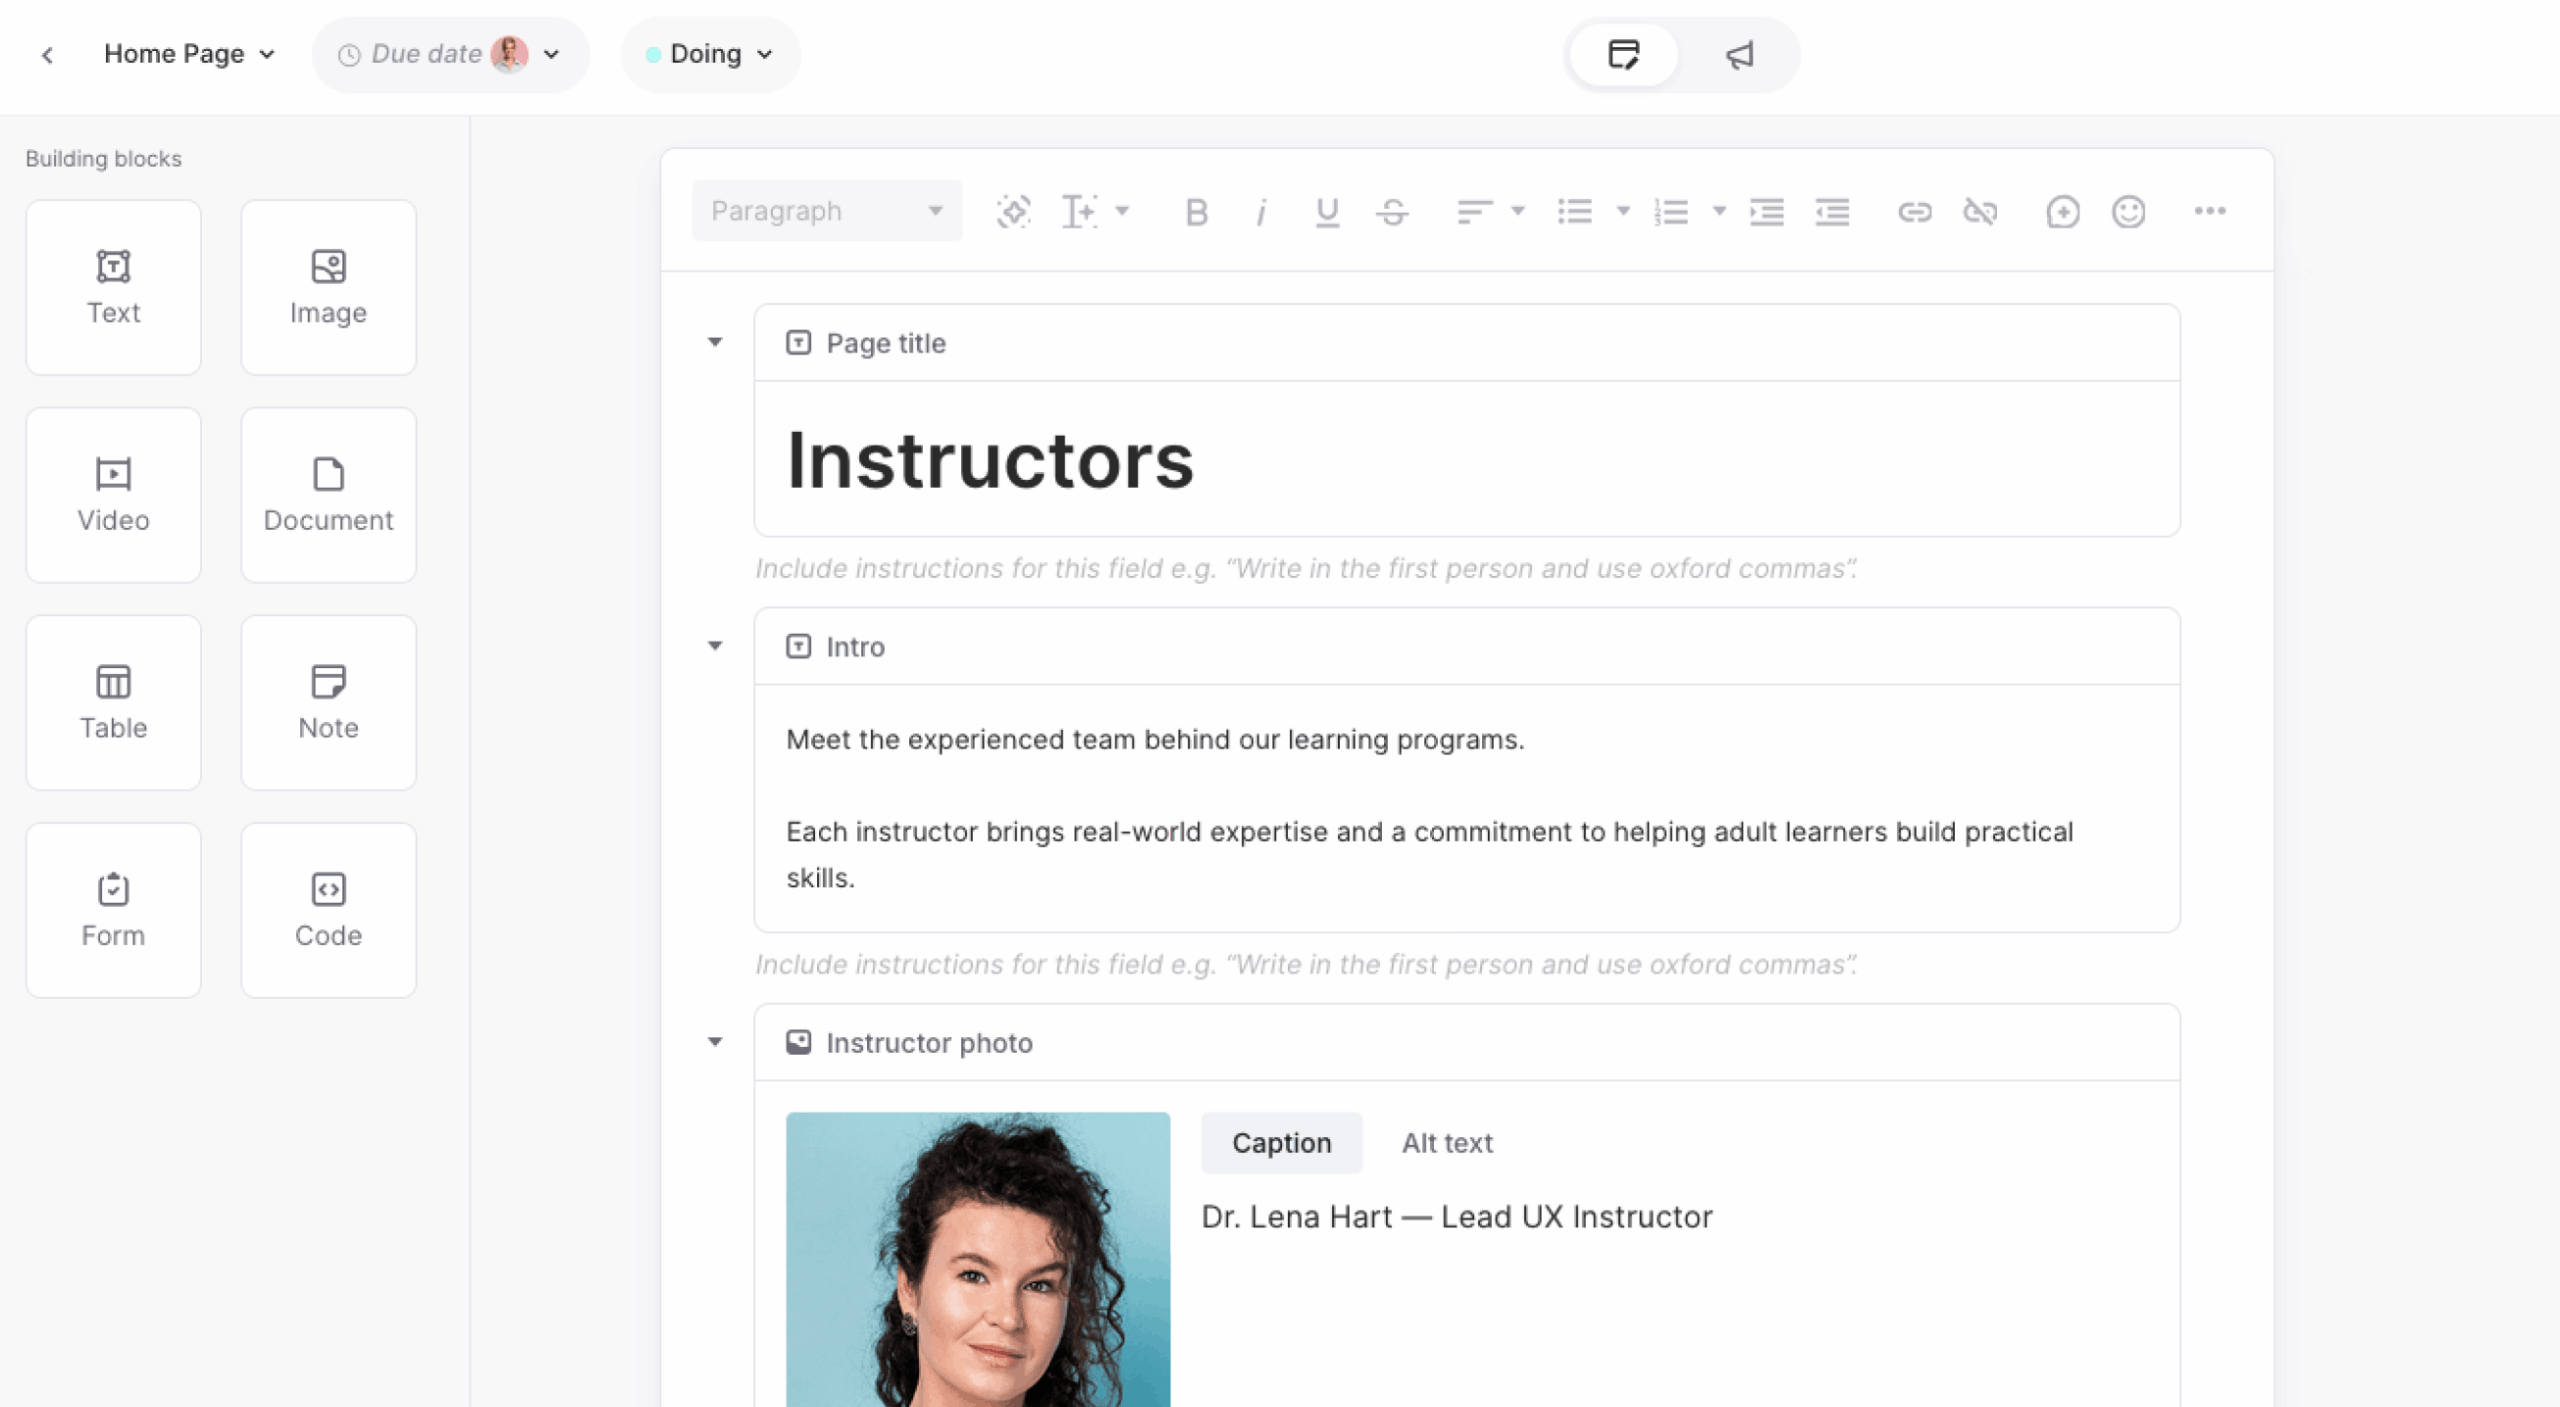
Selecting a content block adds it below the existing blocks. To place a block in a particular position, drag it above, below or between the blocks already on the page.
For a closer look at the editor workspace, available content blocks and editing tools, see Page editor: Quick start guide.
Return to Content Overview
Select the arrow beside the page name in the upper-left corner of Page Editor. When you move the pointer over the arrow, the Back to Content tooltip appears.
Back in Content Overview, you can assign the page, add a due date, apply a template or choose a status as needed. These settings support different workflows, so you do not need to complete them in a particular order.
For template setup and management, see Managing templates in Content Planner. For workflow-status configuration, see Creating and managing Content Planner statuses.
Review scheduled work
Pages with due dates appear in Calendar. Open the Calendar tab to review scheduled pages in month or week view and adjust dates as the project changes.
For calendar controls and scheduling tasks, see Using the Content Calendar.